5 Effective Social Media Marketing Strategies That You Should Implement In 2017

There was a time when social media was seen as a passing fad by many. It was being used by kids and businesses didn’t see any real benefits from it.

However, the skeptics turned out to be wrong with the passage of time.

We don’t need to tell how big social media is.

The sector has grown rapidly than the internet itself.

Since opening their doors on September 26, 2006, Facebook crossed 1.94 billion monthly active users as of March 2017.

Currently, there are 3 billion internet users and around 2 billion of them are active on social media.

Approximately seven out of ten people in the US use social media to connect with one another, share information, engage and also to entertain themselves.

You can check out a recent compilation of the latest social media stats of consumer adoption and usage by Smart Insights.


Needless to say, if you’re not using social media to market your business, you’ll have to learn it or face the risk of losing it in the long run.

Still not convinced?

Here are some things social media can do for your business:

  • Tell prospects about your services and goods
  • Promote your business and brand
  • Attract new customers
  • Get customer feedback
  • Foster relationships with your customer base


Now without further emphasizing on the importance of social media, let’s see how you can leverage on this sector to grow your business this 2017 right from scratch.

5 Social Media Marketing Strategies That You Should Follow Now

  1. Set Your Goals And Objectives

The first step of any successful social media marketing strategy involves establishing your goals and objectives. Moving forward without really knowing what you want can be the perfect recipe for disaster.

Closely peruse your company’s overall requirements and find out how you can use social media to your advantage.

You may come up with many personalized goals; however, there are some common elements that you need to include in your strategy.

These include increasing brand awareness, finding prospects, retaining old customers and trimming marketing expenses.

hd-shutterstock-201979426

Source: Shutterstock

It’s best to focus on two primary goals and two secondary goals. Refrain from having too many goals as it can distract you from achieving none.

Along with goals, you need to have specific parameters in mind that define your goals clearly. For instance, if your primary goal is to generate leads and sales, you need to figure out the number of leads and sales you require even before the goal becomes a success.

An easy way to determine your objectives is to adopt the S-M-A-R-T approach. Your objectives have to be specific, measurable, achievable, relevant and time-bound.

In the example above, if your goal is to generate leads and sales, have a specific marketing objective. You may want to boost your leads by 50%.

Remember to choose objectives that you can achieve.

  1. Create A Brand And Remain Consistent Across Every Social Channel You Use

What’s your feeling when you find different descriptions of the same business on various social networks?

You’d certainly get confused and reluctant to get involved with such a business.

Humans love consistency, and if your social media profiles remain consistent across various channels, you’ll build positive relations with your visitors. They’ll know what to expect irrespective of the social network.

It’s been seen that 60% of internet users in the US expect consistency when dealing with online stores.

It’s best to use the same professional picture on your social networks and even on your blogs.

But that’s not all since your profile picture is just the beginning. Consistency has to come with your brand’s color, imagery, voice and overall outlook. Try to express your brand’s value and remain consistent and authentic in your communication across all your social networks.

Here are four aspects you need to ponder on when deciding on your brand’s voice.

image00-13

Source:socialmediaexplorer.com

After you nail down these aspects, all your conversations on social channels will flow smoothly.

The result………

Your audience will not only connect with you but eagerly wait for your updates.

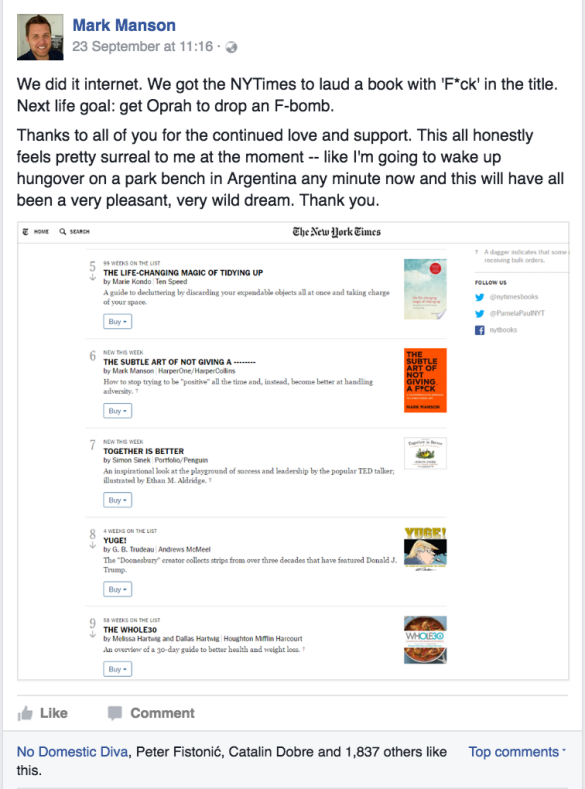
Personal, casual, witty and funny conversational language work well on social channels too.

Mark Manson, for instance, gives a raw, personal and funny tone to social media as shown below.

image08-11 (1)

You may love to read Buffer’s voice and tone guide, which they religiously stick to in all their communications.


  1. Automate Like A Ninja

Find engaging third-party content pieces and share them on your social channels. Let the engagements come in. Next, drop your promotional product updates.

Automating repetitive tasks can free a lot of time, which can be used to work on other high-level marketing strategies.

However, simply pushing out content will not give you 100% benefits of your social media marketing efforts.

Envision yourself meeting a person for the first time. What would be your reaction if the person simply shoves a sales pitch in your face? And what about a person who continuously blabbers about the great things he can do?

You’ll immediately have a bad impression about that person and maybe avoid him next time.

The same thing happens on social media. You can share your updates and blog posts, but always ask for feedbacks and encourage people to discuss more on your posts.

And yes, don’t forget to entertain them.

It’s also a great idea to share pictures from your daily life or special events.

If you are a company, you can share pictures of your employees.

image14-7

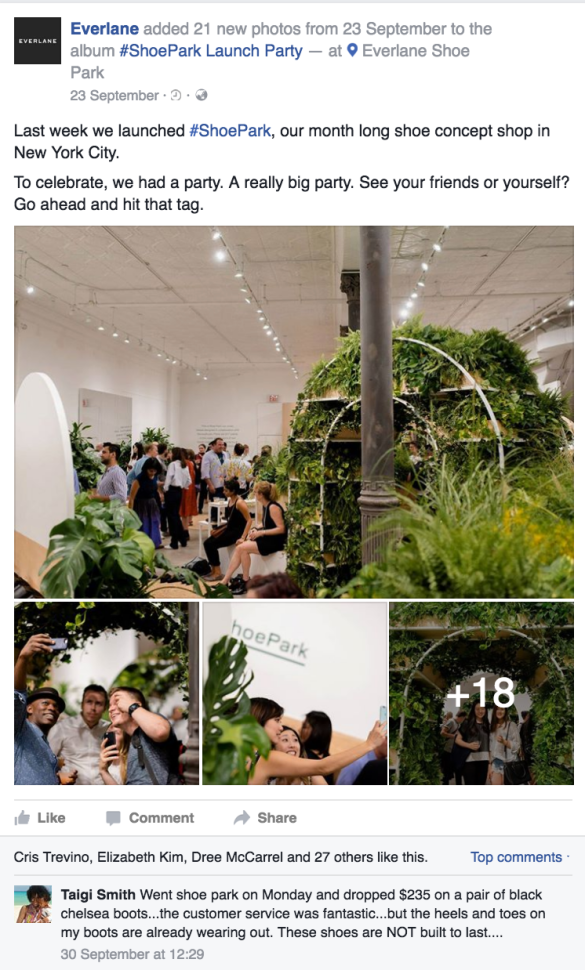
Whenever possible, open up and show your real side to your audience.

  1. Create A Content Calendar And Post Frequently

After creating your Facebook page, you invite a couple of friends and other followers from different social media sites to like your page.

Then, you vanish for a month. This is a normal activity for new businesses on social media. However, if you want to get great results from your social media marketing strategy and build a lasting relationship with your audience, you have to post on a regular basis.

Build a content calendar and prioritize posting engaging and interesting content.

HubSpot’s Social Media Content Calendar Template can easily help you plan your content.

Here’s a simple schedule you can follow in your initial days.

  • LinkdedIn: Once per week
  • Instagram: Once per day
  • Twitter: Three times a day
  • Facebook: A handful of updates per day but don’t overdo.

The timely post made by Oreo, during the Super Bowl, earned them millions of followers and helped in creating a robust brand.

image10-9

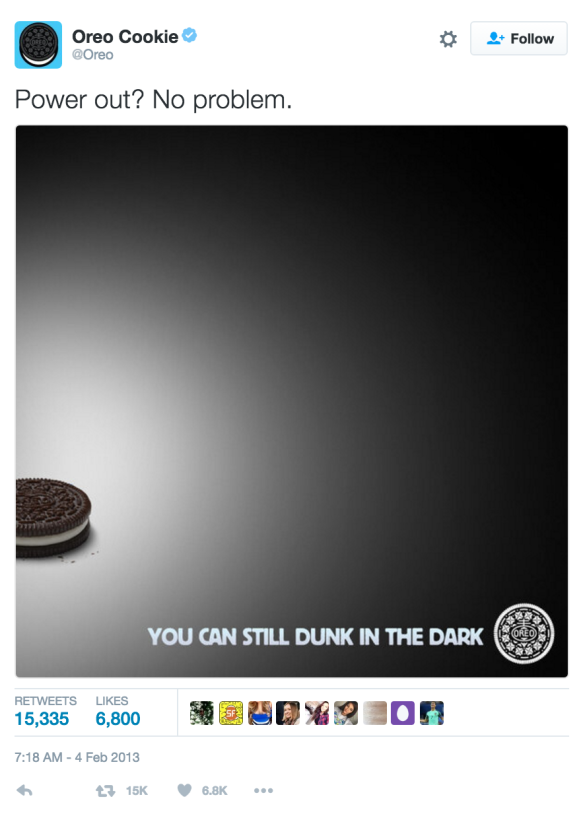
An interesting thing to note is that they had planned for this tweet 18 months before.

  1. Research Your Competitors

Researching your competitors not only apprises you of their activity but also helps you to integrate their tactics into your own social media marketing efforts.

Create a list of at least 5 major competitors. Find out the social sites they use and study their content strategy. Look at their posting frequency and the number of fans and followers. Also, examine the type of content they post and its context (humorous, promotional etc) and the way they respond to their readers.

This will give you a clear idea on how you stack up against each other. It’ll also help you revise your goals, objectives and marketing strategies.

There’s No Such Thing As A Totally Free Lunch

According to Amy Vernon, co-founder of Predictable.ly, any effort on social media marketing takes time and that’s where the budget issue creeps in. She says that if you lack funds but have enough time, you should do the work yourself. However, if there are time constraints, hire someone to get the job done, she further adds. The assumption that creating a social media account is absolutely free and doesn’t cost you a dime is a myth.

Final Thoughts

Social media marketing is a terrific way to build your brand. People socialize every day on the internet and are eager to discover new brands. You just have to put in a lot of sweat and remain consistent. However, the benefits you reap will be worth your time.

What are your experiences of creating a brand using social media marketing?


How to Increase Traffic to Your Website Using Pinterest

Increase Traffic to Your Website Using PinterestRegardless of your industry, Pinterest can increase traffic to your website. Obviously Pinterest works better for more visual businesses like those in the wedding, fashion, food and travel industries than what it does for accountants. But even with accountants, you can still pin helpful content that’ll engage with your target audience. For example, pins which relate to money saving and business tips will provide helpful content to business owners which may/may not be in need of a new accountant.

The way to make Pinterest work for your business is by helping and inspiring your prospective reader/client in order to direct them to your website. It’s not about building followers on Pinterest – it’s about using content to attract readers who will get your brand, love what you do & build loyalty to buy from you. Here’s how to get started:

Create a Pinterest Business Account

With a business account you get access to analytics, rich pins (we’ll discuss these in point 3), and the ability to promote your pins. If you’ve not already got a Pinterest account, click to create a business account. If you have a personal account already, click the following link to switch your personal account to a business one.

Verify Your Business Account

Once you have a business account on the go, you can now verify your Pinterest account. By verifying, you’ll be able to monitor the web traffic coming from your pins. Here’s how to verify using the metatag Pinterest generates:

  1. Go to your profile and click Account Settings.
  2. On profile, in the Website field, enter your website URL and click Confirm Website.
  3. Go on to the next page and see the metatag to put in the <head> of your website.
  4. If you’re using WordPress, login to your website and go to Appearances,then Editor and in the right hand sidebar click “header.php
  5. Within the header.php file, copy and paste the metatag Pinterest gave you. Insert this code in between the <head> and </head> tags in the file. Click to update file and it’s all go!

Apply for Rich Pins

Qualifying for Rich Pins is another advantage to owning a business account. As well as making your business look more credible, Rich Pins enables you to provide more information with your pin. Currently, Pinterest offer 6 formats of rich pins; articles, recipes, places, products, apps and places.

In this tutorial, we’ll use rich pins for articles to explain how to enable rich pins for your account.

The easiest way to set up rich pins is by using Yoast SEO Plugin for WordPress. As opposed to manually adding Pinterest’s metatags to certain places on your site, Yoast SEO does it for you!

To install Yoast SEO click Plugins, Add New and then Upload Plugin. Upload the .zip file for Yoast SEO and click Install Now.  Activate the Yoast SEO plugin by clicking Activate in the Installed Plugins section on WordPress.

Next, go to the new SEO section of your left sidebar. Click SEO and then click Social. Go to the Facebook section and tick the Add Open Graph Meta Data and press Save Changes. Once completed, click the following link to enable Rich Pins by copying a link to one of your blog posts by scrolling to the bottom of Pinterest’s rich pins validating tool.

NOTE: It can take up to 7 days for Pinterest to approve your rich pin application.

Organize Your Boards

In order to engage and gain a following on Pinterest – you need a flawless profile with boards that will attract your prospective reader/client.

Your first 8 boards are most visible. The first 4 are the most important. They show off your brand, show what you’re interested in and show what you do. From this, they’ll get an understanding of what you’re about.

One great way to create an eye-catching Pinterest profile is by coordinating the board covers and name titles. In the world of Pinterest, jumbled up images and mismatched colors won’t do. Your profile needs uniformity. Do this by implementing your brand colors on the board covers and having a style for your board titles. Each board also needs a relevant description that includes keywords your target audience will be using in their search for inspirational content.  

When organizing your boards think:

  1. Who is my target audience?
  2. What content is my target audience looking for?
  3. What do they love?
  4. What content will help them?

Here is an example of a Pinterest profile which engages with its ideal audience:


Pinterest Print Screen

Melyssa helps bloggers and creative entrepreneurs build their businesses using their blogs, social media and email marketing. Her board is simple, matches her brand colors and most importantly – her boards are relevant to what her target audience will be searching. For example: entrepreneur tips, social media tips, blogging tips + email marketing tips.

Create ‘Pinworthy’ Images for Your Blog Posts + Other Web Content

Photography

If you shoot your own photography then great, you’re onto a winner! Your photography will be unique & help form your brand. But, don’t worry, if you don’t take your own photographs, there are heaps of websites that provide beautiful stock photography that is blog and pin-worthy (some are free, too!). Here are a few we recommend: Unsplash, Death to the Stock Photo and Pexels. Take note that tall thin images work best on Pinterest.

The Graphics & Text

You have the photography – now you need the graphics. You can use design software like Photoshop and Illustrator, but if you don’t have the budget, Canva is amazing for creating your own eyecatching pinworthy images for your content (like the feature image for this post. You can add your headline, change text size, add icons, adjust brightness and play with color. For inspiration for the most pinned images on Pinterest, check out this link to find out more.

When it comes to adding your text, your headline needs to grab people’s attention at one glance – so the text needs to be clear and simple.  

Join Group Boards

Joining Group Boards is a great way to build your following, show off your content, interact with industry leaders and prospective clients in attempt to increase the traffic to your website. Pingroupie is an amazing website which allows you to find Pinterest group boards which are relevant to your brand.

Filter your boards by ‘Collaborators’ – ones with higher members are more likely to accept.

You NEED to follow the owner of the group board in order to be accepted.
You may need to email the group board owner in order to be accepted.

Once accepted, try to pin 1-4 images to your group board in a day. Anymore than that then you might appear spammy. Build a good reputation by repinning other members content from the group board.

Curate Great Content for Your Pinterest Boards

In addition to pinning your own content, repinning content helps attract your target audience too.

Curate great content for your boards by following people in your industry, liking, commenting and re-pinning their content onto your boards.

The most likely content to go viral on Pinterest are how to posts, top resources, recipes, guides and checklists. Ensure your pinning seasonal and on-trend content too.

TIP: Pinterest is more likely to recommend your board if it contains lots of popular pins. Once a week go through your boards and delete the pins with low re-pins. This’ll make sure your boards appear to only show amazing content people love!

Schedule Your Pins

Scheduling pins helps save you time + allows you to schedule lots of images to be pinned to your board. Unlike most social media platforms, there are no popular times on Pinterest, Pinterest just likes to see lots of fresh popular content being pinned to your board daily. We recommend using ViralTag and BoardBooster to schedule your pins in advance. 

If you have any questions or suggestions, then feel free to comment below or tweet us @purelysocialtip.

How Personal Should You Make Your Social Media?

IMG_2129

We all have been there – we see a tweet that is borderline offensive but is hilarious and we’ve hit ‘favourite’ before we’ve even thought about the repercussions. As a Blogger of almost five years (and a self confessed social media addict), I can definitely empathise.

I have seen some bloggers go from zero to five thousand followers in a day because of a single tweet. With that said, on the flipside I’ve also seen some businesses go from having 120,000 followers and loosing more than 20,000 followers in an instant because they’ve offended people by being too personal, or by ‘liking’ something that can be disagreed with.

I know a lot of you reading this are businesses looking for advice on how personal to keep your social media and there are also a lot of Bloggers looking for the same information which is why this article will be split into two sections.

The rules for Bloggers and Businesses for social media are very different and so I wanted to keep this clear and individual for both genres.

First thing’s first, let’s talk about it from a business point of view.

1 – Businesses Should Keep It Professional With A Hint Of HumourIMG_2131

The title might seem pretty self explanatory but let me just go into a bit more detail. Businesses, whether you run an online shop or service, are seen as ‘professional’. I would probably expect some Bloggers to say something offensive or using profanity now and again, but I always expect a business to be professional. I don’t really want to see a business sharing their opinions or using profanity. If I am going to spend money with someone, I want to feel safe and know that if I choose to complain to the business, I will be met with professionalism. At the same time, I also want to know that the business is human and has a sense of humor.

2 – So, what is ‘too’ personal in Business?

Here is a list of ‘No-No’s’ for any business on social media:

  • Do not establish any online friendships on a business account
  • Do not use profanity in your statuses.
  • Do not ‘favourite’ or ‘like’ any statuses that contain profanity or potentially offensive statuses.
  • Do not engage in arguments.
  • Do not post any images that were not taken by you or that you do not have permission to use.
  • Do not engage in or post any political, religious or sexual discussions.

3 – What Should My Business Be Personal With

Now that I’ve given you a list of things you shouldn’t do, it’s only fair to give you a list of what to do.IMG_2130

  • Do respond to any messages of complaint or query about an order or otherwise.
  • Do always mention the person’s name in the response (it makes it more personal to the individual).
  • Do always thank users for their message
  • Do keep things light hearted. For example “It seems our website has been enjoying our relaxation products a bit too much! We’re working on getting getting the website working again and apologise for any inconvenience”
  • Do show respect. Be sure to post statuses of respect in regards to the deaths of popular people (celebrities) for example “Rest In Peace Whitney Houston. We will forever be affected by your music”.
  • Do post cute animal pictures. Everybody loves a cute cat!

These tips will definitely keep your business on the right path on Social Media. If all else fails and you instantly regret posting a status or make an embarrassing spelling mistake, then there is always the delete button. We’ve all been there!

Now moving on to Bloggers.

1 – Bloggers should keep it personal with a hint of business.IMG_2132

I’m completely reversing the formula in comparison to how businesses should behave on Social Media.

I’m a Blogger, so writing about how to behave on social media as a Blogger is really easy for me. I have literally made every mistake in the book so I can 100% talk with experience.

People read blogs to feel connected with someone. I read blogs because I like to hear their opinions on products, fashion and even politics. So it’s important that your social media feeds aren’t just filled with “have you seen my blog post? Visit www.no-one-wants-to-see-this-sort-of-thing12345.com.” type posts.

When users follow you, or visit your social media, they’re looking for a real time version of your personality. They want to connect with you and are happy to read about your daily activities and hear all about the first date that went wrong. What users don’t want to see is controversy for the sole point of being controversial and trying to get followers. It’s difficult knowing boundaries as a Blogger on social media as users still expect a ‘degree’ of professionalism from Bloggers as people of online influence.

2 – What Not To Do On Social Media As A Blogger

Here is a list of a few things I recommend a Blogger does not do on social media:

  • Do not get involved in arguments or heated debates. It just portrays you as a ‘troll’.
  • Do not post ‘click bait’ titles to your blog – followers see straight through them and invariably dislike it. (Click Bait titles are catchy titles such as “I’m Marrying My Dog?” when actually you simply say “I love my dog so much I’d marry him if I could” within a blog post that is completely different to the status).
  • Do not post images that belong to other bloggers unless you have their permission.
  • Do not start a campaign unless it is something you truly are passionate about and there are no other likeminded campaigns to get involved with. Followers see it as attention seeking and invariably unfollow.
  • Do not post controversial statuses just to get followers.
  • Do not criticise other bloggers or celebrities. Followers just think of it as ‘sour grapes’.
  • Do not post anything sexually explicit, religiously controversial or politically damning. You could be sued. Yes, it has happened to other bloggers.

These are the holy grail of social media No’ No’s for Bloggers so be sure to stick to them.

3 – What should I be posting as a Blogger on Social Media?

Here’s a list of a few things I would recommend posting as a blogger on social media:

  • Do show a BTS (Behind The Scenes) image – people love to see how you work when you’re creating content.
  • Do reply to people who take the time to tweet or message you. It’s just good manners and makes you more human.
  • Do post positive quotes and memes – these are a ‘favourite’ and ‘liking’ goldmine.
  • Do let people see snippets of your life, such as your meals, workouts, outfits and so forth.
  • Do get involved in discussions – politely!
  • Do advertise your blog content (2-3 times per day is most effective)

These ‘do’s will be sure to keep your social feed interesting at the same time as serving it’s purpose which is ultimately to drive traffic to your blog.As you can see, being a business and being a blogger are two very different things and as such come with very different ‘guidelines’ for social media.

One thing that does apply to both bloggers and businesses is that if you are sent a ‘troll’ like message which contains profanities and is derogatory to you or your business, then simply do not draw attention to it and ignore it. Rising to it encourages more comments of the same nature and makes you or your business look bad at the same time.

I hope you’ve found this article helpful! If you have any questions or suggestions, then feel free to comment below or tweet us @purelysocialtip

Until next time!

Holly x

Email Marketing 101: How to Use MailChimp to Send Your First Email Newsletter

How to Use Mailchimp to send your first email newsletter

For every $1 you invest into email marketing, you earn $38. With such a staggering return on investment, a strategized email marketing campaign can bring in a hella amount of sales. To get the ball rolling, head over to MailChimp right away to register for your free account and then we can get your first newsletter on the go! If you are wondering why we’re recommending using MailChimp to send out your email newsletters, check out the benefits below:

  • You can use MailChimp for FREE if you have less than 2,000 subscribers.
  • MailChimp is a widely used mailing system you’re not short of software and plugins that’s compatible with MailChimp. 
  • And, as it is so popular, if you’re stuck with something, you can easily find advice & tutorials on absolutely everything!
  • It’s also amazing for those of us who aren’t so design savvy. MailChimp allows us to easily put together a beautiful email using the email text editor and add in images and columns using the drag + drop template.

So get yourself signed up for your free account, make yourself a drink and follow this MailChimp tutorial to get your email marketing campaign into full swing! By the end of this blog post, you will know:

  • How to create a ‘list’ of subscribers.
  • How to create a subscription form for your website.
  • What to include in your welcome email.
  • How to design and send your first newsletter.
  • Why you need to include a mailing address & how to change it.

1. Create Your First ‘List’ of Subscribers

First thing’s first, you need to create a list to start collecting email addresses. A ‘List’ is the area where your subscribers name and email address are stored. You can have as many or as little lists as you like for example, you could create a list solely for those who have downloaded a content freebie from your website and/or dedicate a list to your current clients.

To create a list, go to ‘Lists’, then press ‘Create List’ and then enter your list details (see below). In the “from” email and “from” name – you may want to fill in your contact email address and a recognizable name such as your URL or business name.

You may or may not be aware that it’s a legal requirement to include your address in every email you send out. If you have a business address this is easy. If not – you’re not going to be comfortable with showing your home address, so you may want to consider getting a PO Box.

2. Design Your Subscription From For Your Website

Creating a subscription form that suits your website’s style and brand colors is easy on MailChimp. You can quickly put together a form without the need to learn code by using the easy-to-use form customizer.

Follow these steps to get your sign-up form up and running – believe us – you can literally have one designed and set up in just a few minutes!

Click ‘Sign Up Forms’ and then ‘General Forms’.

You’ll then be taken to a ‘Create Forms’ page. Select ‘Sign up form’ from the drop-down menu under the ‘Forms and response emails’ heading.

Now to build your form. The key is to keep things as simple as possible. On the ‘Build It’ tab you can select what fields you’d like to use. Make it as user-friendly as possible by keeping the fields to a minimum. This will avoid people closing the signup form. Only use ‘first name’, ‘email address’ and at the most ‘last name’. You can remove a field by hovering your cursor over each text box.

Add a message by clicking the ‘click to edit the message’ box. Here you can add a branded image and a persuasive message to get people signing up to your newsletter (see print screen below).

image 1

As activation is required – mention in your content by asking your subscriber to check their junk email if their activation email doesn’t show up in their inbox.

To get as many subscribers as possible, you’ll need a lead magnet. Giving away content is one of the best ways to do this. So put some time aside to brainstorm and create a free download to offer to your potential email subscribers (you can find lots of advice on building your subscribers in our blog post – How to Grow Your Mailing List).

MailChimp makes the designing part easy. Click ‘Design It’ to choose your color scheme (our tip here is to stick with your branding colors).

Don’t forget to save the link of your sign up form. This’ll help you promote your email newsletter or lead magnet. And – you’ll be able to promote your URL on social media and on your blog.

image 2

3. Create Your Welcome Email

You can create your ‘Welcome Email’ by clicking ‘Lists’, then select your list, click ‘Signup Form’, then ‘General Forms’, then find ‘Final “welcome” email’ from the drop down menu and tick the ‘Send a final welcome email’ option. Scroll down and you’ll find yourself on a page featuring the welcome email editor like below:

image 3

Now you can design your welcome email. In the same way you created your sign-up form, you can upload your banner logo/image, edit the color and add a thank you message.

If you’re adding a lead magnet to your welcome email (which we highly recommend) this is where you’ll add the URL so your new subscriber can download their freebie.

To get a unique URL for your lead magnet, save your free download as a PDF, upload to your media library on your website, once the PDF has saved, you will find the URL in the file details AND this is the URL you will add to your welcome email.

The welcome email automatically has the title ‘subscription confirmed’ but you can edit this to sound interesting.

4. How to Design & Send Your First Newsletter

Now you’re ready to design your first newsletter!

Click ‘Campaigns’, then ‘Create Campaigns’, click ‘Regular Campaign’, select your list, press next, add an interesting subject line and edit some other settings if you’d like.

Now to select a template. Depending on what you’re including in this newsletter, you can pick a template that’ll be best suited to your content. See an extremely simple email example below:

image 4

If you’re linking to your most recent blog posts, selecting a design where you can add images for each post with the option to write a caption underneath. If you’re using this email to promote a new service or product a design with a 1 column for a top paragraph and 2 to 3 columns below to lay out the benefits of your product may work well.

Next you can type in your text, drag and drop in your images, edit the header text and add URLs for your social media profiles. You can select your colors and fonts for your page, preheader, header, body and footer on the ‘Design’ tab.

Once you’re happy with your email or ‘Campaign’ (in MailChimp lingo), you can click ‘Next’ to save your template. The next page will give you the option to send out the email straight away or schedule it to go out on a particular date or time.

Now you have created one template, you can create multiple email templates to serve a range of purposes; promoting discount codes, special offers, new products, latest content, advice and a recap of your recent blog posts.

TA-DA! Your first email newsletter is finished! How easy was that?! Now you’ve gotten to grips with MailChimp, you can now plan your email marketing strategy to get your sales booming! If you have any questions, please leave us a comment below. 

30 Engaging Ideas for Blog Posts

30 ENGAGING IDEAS FOR BLOG POSTS

Welcome to the world of blogging. A place where you publish problem-solving content and build an online community that engages with your target audience.  And – by doing it consistently and strategically, you can establish a trustworthy brand that revolutionizes your business.

As you begin blogging for business, you can use this list of ideas for blog posts to create a content plan for your business to attract your target readership and help determine what content works best for your readers.  Just remember, you don’t need lots of traffic to build your business online; you just need an audience who can easily engage with your brand.

  1. How-To Post

Blog posts that show your readers how to do something are always incredibly popular. ‘How To’ offer invaluable advice that provides problem solving information that your readers are searching for answers on for example, if you’re a business that sells unique tea blends, this could be as obvious as “How to Brew Tea” or like our blog post on How to Get Steady Customers Fast and Free.

  1. Tools That Make Things Easy

Humans are lazy and more often than not – incredibly busy. We’re constantly looking for apps, new processes, websites and plugins that shorten the time it takes to do something and make our lives easier. For instance, we shared our most useful plugins that help schedule social media updates and blog posts.

  1. Review a Product Related to Your Niche

Prospective and current readers might be interested in finding out whether a certain product is worth the investment – sharing your insight into the benefits or criticisms of a product will give your readers answers.

  1. Inspiring Books

Whether its books that has motivated us along our journey or given us helpful business tips – your readers will find this information useful.

  1. A Series of Q&A Posts

Not only will Q&A posts help you interact with your target audience, they will provide answers to your readers’ questions and create extremely helpful content for your website.

  1. Tutorials

Create “Top 10” or “8 Tips for” advice posts, product demonstrations or videos about topics related to your niche. We’ve helped our readers by sharing our Top Five Tips for Blogging Success, 5 Best Tips on Sharing Content and Top 7 Mistakes Businesses Made with their Digital Marketing in 2015 & What Can be Done to Fix It in 2016.

  1. Promote a Free Downloadable Guide

One of the best ways to build your mailing list is by offering a free downloadable worksheet or guide to help your readers. You can promote your free download by explaining its benefits in a blog post.

  1. Inspirational Famous Quotes

Whether you’re a nutritionist, business coach, personal trainer or cosmetic surgeon there are quotes related to your industry. And – people love reading them!

  1. Host a Giveaway

One great way of getting your audience to share your content is by giving away free products. You could offer your services, products, prizes or treatments…everybody loves free stuff!

  1. A List of Useful Online Resources

Read any blog posts, taken a course or watched videos that have helped you? Share them with your audience!

  1. Interview Someone in Your Industry

As well as giving your audience advice, your interviewee will share it on their social media platforms and/or website which will put your brand in front of a relevant audience.

  1. Behind The Scenes of Your Business

Post images and short videos showing how your business is run – this will add a bit of personality to your brand!

  1. A Link Up of Helpful Blog Posts

A great way for getting yourself known in your industry is by connecting with similar, bigger businesses. Make yourself known by linking their content in a blog post and tagging them into your social media posts.

  1. Share a Project You Have Recently Completed

Prove yourself to your audience by showing off your skills by sharing images of a recently completed project.quote 30 engaging blog post ideas

  1. Business Goals for the Year

Between Christmas and the start of a New Year, business goals or New Year’s Resolutions get a lot of traction. Share yours!

  1. Write ‘Benefits Of’ Posts Related to Your Niche

Similar to tutorials, people are looking for reasons why they should buy into something. Show you’re an expert by writing about the benefits of something related to your industry.

  1. Share Your Opinion on a Film or TV Series Relevant to Your Business

Marketing has Mad Men and Steve Jobs to talk about. Write a blog post about based on your views about a TV show or film that has mentioned a topic related to your business.

  1. Round-Up of Your Most Popular Posts

Once you’ve been blogging for a while, you’ll be able to see which posts have performed best. Put them all together in a post.

  1. Things You’ve Learnt from Recent Training, eCourse or Book

We’re always learning. Writing about things you’ve learnt will show transparency on how you’re always willing to improve.

  1. Write About Something New in Your Industry

Last year, Twitter released the forever growing live streaming app that is Periscope so we written A Beginner’s Guide to Periscope to advise people who don’t know anything about the app.

  1. Beginner’s Guide

Similar to ‘How To’ posts, ‘Beginner’s Guides’ will give your target audience the information they’re looking for. We’ve written A Beginner’s Guide to Snapchat and A Beginner’s Guide to SEO.

  1. Motivational Mottos

We all love things that motivate us. Share motivational mantras and mottos that have helped you get to the position you’re in now.

  1. A List of Dos & Don’ts Related to Your Niche

During your time in business, you may have learnt something that’ll prevent your readers from making mistakes for example, when it comes to social media, refrain from publishing your problems or controversial beliefs on your business profiles as it may damage your reputation.

  1. Write a Follow Up Post to a Post You’ve Already Published

Written a post you could provide more information on? Write a ‘Part 2’ blog post.

  1. Blog About Hot Topics & Trending Events

A great way to publish content on talked about and most-searched topics is by writing a blog post on how your services and products relate to them like this post on Taylor Swift Vs Katy Perry: Which Star Rules Social Media? Or if you’re in the beauty related industry – a post on a trending out of the ordinary thing a celebrity is doing like, Kim Kardashian’s Vampire Facial would engage with your readership.

  1. Share Your Business Processes

Nubby Twiglet, a graphic designer has recently shared her knowledge on how to can streamline your business processes by sharing how she communicates with prospective clients, signing on a client, gathering design briefs, putting together project checklists, presenting your work and invoicing.

  1. Update Your Audience with What’s New in Your Business

Hired someone new? Releasing a new product or service? Blog about it!

  1. Your Predictions

Got an idea what’s going to be on trend in a year or season in your industry? Share them in a blog post.

  1. Publish Your Testimonials & Case Studies

Demonstrate you’re worth investing in by showing what your clients say in a blog posts. If you can show how you’ve helped a client by sharing your results in a blog post.

  1. FAQs

As your business grows and gets older – you may find you get asked a lot of the same questions. Write answers to your FAQs and publish them into an easy-to-find blog post to help your readers.

How To Use Instagram In The Beauty & Fashion Industry

IMG_1294

Often I’m asked how I keep up with so many different social media platforms for my beauty blog. The answer is simple: research! Before deciding on four of the platforms that I thought are most beneficial to my business, I took some time to do research and really see what platform was best for me. See more about that process here. Of all the social platforms I’ve used, Instagram is easily one of my favourites as it is effective for promoting my blog content and interacting with my followers. Not forgetting to mention that I’ve found gaining new followers to be relatively easy on Instagram (Bonus!).

So how can you use Instagram to promote your business?

Well, there are a few elements of Instagram to explore including using hashtags effectively, promoting your brand and how to gain new followers (we’re even discussing the pro’s and con’s of ‘buying’ followers #controversial). First, let’s talk about Instagram in general.

Firstly, Instagram is a photo sharing app. You can only access your Instagram via a cell phone or smart device. Initially, when I started using it, I found this frustrating because I wanted to access Instagram on my laptop or desktop PC when I was working rather than going on my phone and accessing it. Now, however, I actually prefer Instagram being an app rather than a website because it makes it more personal. As you will know if you read these articles regularly, I’ve mentioned that being personal is a followers goldmine. If you offer a personal touch to your online presence, people are going to interact with you as they do with their friends or family on social media. Not only that, but you can post to Instagram during your social hours without having to load a computer. #LazyBlogger…

In terms of content, keeping the pictures close to your business theme is recommended to ensure your potential followers know what they are to expect should they choose to follow you. Don’t be afraid to post up a cute cat picture now and again though, it shows you’re human and who doesn’t love a cute cat? (I’m Holly and I am a cute cat addict). Try to keep your content unique – no-one is interested in seeing the same thing on several accounts. New content is what engages your visitors.

Oh and for those of you who are like me and prefer to pre-schedule, you can also use Buffer or other social media management apps to time your instagram posts. You can thank us later.


Using Hashtags Effectively

The social media world is centered round hashtags right now. People are using guaranteed big search items like the Kardashians dropped into everyday statuses and conversations to attract a larger audience. Some hashtags attract a bigger audience than others, but just because a lot of people may see your post, doesn’t mean those people will click on it or interact with you. To effectively promote your blog, brand or business, you will be looking to encourage interaction on your social media pages. Very seldom will anyone visit your website or business based on a sweeping glance. More likely, is that they will visit if they see something relevant to what they’re searching for.

If you load a search engine and search for ‘popular Instagram hashtags’ you will see everything from #instadaily to #happy and #winitwednesday amongst dozens of others. While those hashtags are fantastic for posters who have daily content, who have a happy picture to share, or are hosting a competition. In the beauty and fashion industry other hashtags are proven to be most effective. Top beauty and fashion hashtags include:

  • #bbloggers (beauty bloggers official hashtags where other bloggers see the content – many of my followers are actually fellow bloggers so don’t forget to reach out to others in the same industry as you!)
  • #OOTD (Outfit of the day where people searching for this are looking for fellow fashionistas and fashion inspiration)
  • #hairspiration (gorgeous hairstyles from colour to styles can be found under this hashtag)
  • #fashion or #psfashion (pretty explanatory and #psfashion is for plus size fashion)
  • #makeuptutorial (short video clips showing mini makeup tutorials)

IMG_1295

Of course, there are dozens of other hashtags that can be used, so take a look at Top-Hashtags to take a look at more.

Using the hashtags in your post is simple. Steer clear of adding them throughout the status and always use less than seven in each post. A lot of people recommend using three or less, however as a personal opinion, I don’t mind seeing five or less and a lot of other instagram users have similar thoughts.

Here’s an example of an Instagram post using hashtags:

*insert image* – Loving this gorgeous eyeshadow. Who else thinks copper eyeshadows are beautiful? #bbloggers #makeup #copper #beauty

How To Gain Followers

Normally on social media, you can spend hours on end commenting on statuses and will get little to no followers. However Instagram is a whole new ball game. By searching for hashtags in the search feature, you will find thousands of users with similar interests to yours. Simply ‘liking’ their photo and commenting can encourage that user to not only follow you, but to also interact with you.

People like to be part of something popular, so once you get above 200 followers you are more likely to see an increase in followers simply by posting regularly. Which brings me to my next point, buying followers.

This is a controversial one because a lot of people dislike the thought of ‘buying’ followers. A lot of people might think there is no point in buying followers (I, myself, choose not to but it doesn’t mean I never will). Because people like to be part of something popular, you’re more likely to gain followers when you already have a lot of followers which is why some bloggers use sites such as fiverr.com to buy followers. It’s not against any rules as long as the accounts are active and comply with the standard user rules of Instagram so this is really a personal choice.

You can also promote your Instagram posts if you have a decent budget. For more information on this head on over to the Instagram help pages.

One thing is certain, Instagram is a social media platform that will always be around. With literally millions of users posting daily, the advertising and promoting potential for your business is endless.

We would love to hear your thoughts on Instagram (and what your thoughts are on buying followers!) so please do feel free to leave your comments below or tweet us @purelysocialtip

How Snapchat Can Be Used In The Fashion & Beauty Industry (Including Bloggers!)

IMG_1006

Hi everyone!

It’s Holly again back to give you some more insider information on Snapchat and how it can be beneficial to the beauty and fashion industry. Last week, we discussed how to set up and use SnapChat, so now that you’re a pro, it’s time to put your practice into good use and efficiently use the platform for your business or blog.

A lot of people might be wondering how the beauty and fashion industry can benefit from using a social platform such as Snapchat and the answer is simple – it builds a community. Releasing new products is all fine and well, but in order to make those products the most sought after items in the business, you will need to create some sort of community and hype around them which is where Snapchat fits in just nicely.

Let your followers become industry insiders…

As we mentioned in the “beginners guide to Snapchat”, anything you post to your followers will disappear in 10 seconds. To some this might seem like a pain, but actually, it makes your followers feel as though they are part of an exclusive club where they have had a ‘sneak peak’at something that a lot of other people might not have seen. It gives them a backstage insight to the industry and that is where the Fashion and beauty industry can use Snapchat to their advantage.

Fashion week is the biggest week on the fashion calendar which will see everyone from high street to designer brands showcasing their latest and upcoming trends for industry insiders and press. Unfortunately, us mere mortals don’t have the status to mingle with Kimye and Victoria Beckham so we rely on press coverage to let us in on the inside scoop. Now, brands are turning to Snapchat to document snippets of insider knowledge and backstage model diva drama for their followers to see. As each clip only lasts 10 seconds before it disappears forever and ever, followers will be left wanting more which will encourage social media interaction and even increased visitors to your website. (Remember, Visitors = Sales!). Brands such as Juicy Couture, Burberry & Alexander Wang all use Snapchat to promote their brands. If it’s good enough for them… right?

So, as a small Fashion brand, how can you use Snapchat for your business?

IMG_1007
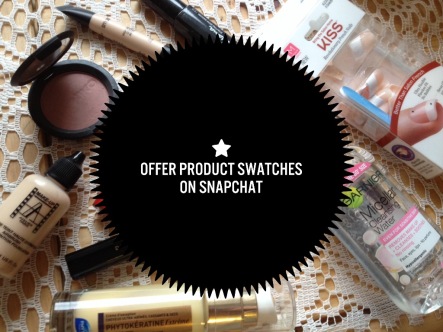
It works quite similarly for you as it does for the large companies. When new products are being created, perhaps consider capturing a snippet of a creative meeting, of fabric swatches, or of an upcoming advertorial for the season ahead. Because you are only showing a 10 second clip of it, you leave your followers wanting more as was mentioned earlier. This also works for beauty brands too where you can showcase new product ideas, color swatches and new packaging. As a beauty and fashion blogger myself, I can safely say I love this kind of content and even though I know the brands are trying to sell themselves, I fall for it hook, line and sinker. I want to buy the new products and I want to be the first to know all about them.

You can also send exclusive offers to your Snapchat users. So for example, you can take a picture of a dress and include the caption:

“20% off for Snapchat users using code 0000

the snap only lasts 10 seconds so not only will this encourage your viewers to act immediately, it also lets them feel as though they are part of an exclusive club. Of course, everyone wants to be part of an exclusive club, just like I want to be part of Taylor Swift’s Squad… Moving “swiftly” on. (pun intended).

Now that we’ve taken a look at how Snapchat is great for promoting Fashion and Beauty Brands, let’s take a look at how Fashion & Beauty Bloggers like me can benefit from using it.

I’ve been blogging for almost five years, and since starting out, I’ve probably signed up to around 20 different social media platforms. Some of them work better than others and more often than not, the ones I expect to work the least for me, end up being a huge source of traffic to my blog. One of those very platforms is Snapchat.

I initially started using Snapchat a year or so ago where I enjoyed sharing cute snippets of my cat wearing my slippers (still gets me laughing to this day) with my friends until one day I realized that I was being left behind. Other Fashion and beauty bloggers were using Snapchat to promote their blogs in ways I didn’t even think about.

As I mentioned earlier, brands like to showcase snippets of upcoming launches and bloggers are no different. Whilst bloggers invariably don’t have new products of our own to showcase, we are able to share with our visitors what is coming up on the blog in the coming week.

As scheduling is a vital part in keeping every blogger sane (trust me!), we invariably have our content planned for the week ahead and so this means we can show snippets of us typing a blog post and highlight eye catching segments such as:-

“The $3 mascara that wins the Volume battle hands down”

Then caption it “Coming tomorrow on my blog”.   Users will be enticed to see this wonder mascara and are likely to visit your blog to see it. Clever huh?

Another way for fashion and beauty Bloggers to use Snapchat to their advantage is to offer your followers something exclusive that they can’t find on your blog or Twitter. For example. If you are doing an OOTD IMG_1008
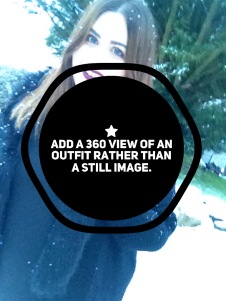
(Outfit Of The Day)blog post then a still image is perfect for your blog, but on Snapchat you could record a
clip of a 360 degree view of the outfit where you zoom in on key features. For Beauty bloggers, you could show lip swatches of a new lipstick on your blog but to offer your snap chatters something a bit more, you can record yourself applying it and biting into an apple to prove the product doesn’t smudge easily.

Not only does this drive traffic to your blog but it also encourages more followers to your SnapChat.

Be sure to cross-promote your snapchat channel at the bottom of a blog post where something ‘extra’ is offered on Snapchat. Be sure to share your username across social media too and watch as your followers and blog visitors increase day by day.

IMG_1009Similarly to brands, bloggers can also offer exclusive deals such as competition entries and interviews to people who comment on your snapchat content. Again, be sure to blog about this on your blog and mention it across other social platforms to let people know that they can expect a lot from you on Snapchat.


Snapchat is also rumoured to be offering advertising opportunities in 2016 although this has not been confirmed.

So now that we’ve covered how Snapchat can be beneficial to the fashion and beauty industry, what are you waiting for? Get snapping and be sure to leave your usernames in the comments below!

Top Five Tips For Blogging Success

IMG_0671

The road to success is always paved with pot holes. It can be a bit of a bumpy ride sometimes, but if you know the right roads to take, you can bypass those potholes and have success without the hardship.

Take it from me. I learned the hard way! It is very easy to get lost on your way to the end game. I started out my career as a blogger simply reviewing products and begging PR firms to send me products. I did not realise that no one wants to read posts from someone bragging about how much free loot they managed to bag, not to mention that no one would even find that post. Turns out simply writing content and putting it online doesn’t mean it will automatically go viral if you don’t promote it (see our post on the best ways to share content here). As time went by, I soon learned how to perfect my blogging technique. Here are my Top Tips for Blogging Success to make your journey a little bit easier.

1 – Platform

Deciding which blogging platform to use can be tricky. However, it is an important decision to make! Changing your mind once you have established your blog can be very tricky and highly time consuming. There are two preferred platforms that bloggers use: WordPress and Blogger.

WordPress is a platform designed for more advanced users who may have experience in using plugins and HTML. The platform allows users to add more features into their blog and to incorporate downloadable features. WordPress itself is free to use, however you may need to buy a hosting package if you’d like a custom domain (Hostgator is popular amongst bloggers). Many of the plugins and templates are free to download and use, but there are premium paid for versions that provide more options.

Blogger on the other hand is a completely free platform which hosts your blog. The platform is open source and allows new users to design their blog at just the click of a few buttons. To add to this, the simple to use platform is also owned by Google which means it’s not going anywhere anytime soon.

To summarise, if you know your way around the web and are pretty good with coding and would like customizable options, then WordPress could be the option for you. If you’re new to blogging or web design as a whole, and have limited to no budget, and prefer a more turn-key option then Blogger is likely to be your preferred option.

2 – Timing

IMG_0673

Timing your blog posts to publish on a specific day and time can prove to be successful with your visitors. Us humans are creatures of habit and so letting your visitors know that you will be posting new content on a certain day or time will encourage regular visitors to return at that time.

Timing your blog posts also helps you to target different time zones. For example, if you have a business in New York but think people in the UK will be interested in your content, then there’s a five hour time difference to take into consideration. Scheduling your blog post at 2pm UK time (9am New York) will mean New Yorkers will wake up to read it before work or whilst commuting, whereas the Brits will read it in either their lunch or coffee breaks. Scheduling is available on both WordPress and Blogger.

3 – Topics

Whether you’re a fashion blogger or a holistic therapist letting your visitors know about what you have to offer, it’s important you choose the right topics to not only attract new visitors but to keep those visitors on your blog.

Writing controversial posts may bring in a few visitors but in terms of gaining credibility for your business, it certainly won’t do much good. Many bloggers write about topics that answer a question. This provides information for your visitors and encourages them to browse around the rest of your blog. For example, if you have a Holistic Therapy business, try writing about the benefits of holistic therapy in comparison to other methods, or perhaps a blog post highlighting a specific ailment that holistic therapy has successfully treated. These areas are fairly non controversial and will provide useful information to those reading. By veering off topic, your visitors will become confused as to what your blog is actually about.

4 – Design

Keeping your blog simple and easy to navigate through is just as important as having any content at all. Ever visited a successful website that was full of graphics and a loud background with obnoxious writing? No, that’s because users don’t find a ‘busy’ blog, a ‘friendly’ website. Many Bloggers choose to stick to a white background and accentuate it with one or two colours in the navigation or sidebar and banner. Every blog has a decent amount of photography which in itself adds colour to the blog.

In terms of photography, ensure you make your photo’s large and clear without being overly edited. Don’t stretch the photos or you risk significantly reducing the picture quality. Aside from that, whether you choose to use a big fancy camera or a cell phone camera, your photo’s will be one of the main attractions of your blog.

5 – Social Media

IMG_0672

Promotion is key to blogging success which is something we have talked about previously here on Purely Social Media. Many people leave out promoting their content on social media or tweet about it once and think ‘that’ll do’, however the truth is that your blog will never reach the masses unless you shove it in people’s faces and let them know it exists.

Twitter, Facebook and Instagram are three of the most popular social media platforms amongst bloggers and all can be managed using different platforms such as Hootsuite or Buffer where you can schedule your social media updates in advance. Scheduling your social media updates means you can take the time to carefully plan what you wish to say in your status and creating links to be included. A good job is never a hurried one!

The value of social media to your blog or business is invaluable. All it takes is for someone popular to retweet something you’ve said and it can receive thousands of visitors overnight. For those of us who are not quite fortunate enough to have famous fans, social media is vital whether you have twenty or twenty thousand followers. One more person seeing your content is one more than you had before.

Finally for social media, it’s important to use your platforms to interact with your followers/visitors. Whether you have a blog or a shop, it’s useful for helping with any issues or customer services. If you interact with your followers, you gain trust in your website and business which will encourage returning visitors and customers.

Summary

These five tips will definitely steer you and your blog in the right direction without spending a single dollar. I could easily have written a dozen more things to help you on your way but having a successful blog won’t happen overnight and you certainly can’t learn everything there is to know about blogging overnight either (trust me, it’s taken me more than three years and I’m still learnng!)

Until next time, make sure you let us know your thoughts by commenting or by tweeting us @purelysocialtip

5 Best Tips On Sharing Content

besttipsonsharingcontentHi everyone! It’s Holly here. I’m back once again to let you know a few tips I’ve picked up on sharing your blog content across the web so that even superstars like Johnny Depp can find it… A girl can only dream!

As we all have learned by now, blogging and content sharing go hand in hand. While having great content on your blog is definitely important, sharing that content is equally vital.

Imagine hosting a dinner party full of celebrities and forgetting to hand out the invitations. The dinner party has everything you could need to make it incredible, but no-one attends because you haven’t shared the information (or handed out the invitations). Blogging is no different. You could have an interview with Princess Kate Middleton on your blog where she gives you the inside scoop on her outfits for next season but if you forget to tell anyone that the interview exists, then no-one is going to look at it which is why sharing your content across the right platforms, using the right strategy and format is vital in making your content popular. Poor Kate..

Every time an actor stars in a new movie, you will see they are working the media circuit by appearing on chat shows and doing magazine shoots. This is because throughout these appearances, they are promoting their new releases to let the world know it exists. Celebrities are clever little creatures aren’t they? Well you can be equally as clever. Sharing blog content is a little bit different from appearing on chat shows, but it’s not necessarily hard to do.

So how can you share your content like the pros? Here, we take a look at different methods on how and where to share your content.

1 – Automatically share your content.

There are several platforms available that will automatically share your content to social media. Twitterfeed is the platform that many top bloggers use to share their content. Despite it’s name, Twitterfeed shares content across more platforms than just Twitter. Registering is as simple as entering in your details (name, email address, fingerprints.. (jokes)) and your social media handles. You will also be asked to allow Twitterfeed to post on your behalf thus allowing access on those platforms. Then, just sit back and watch as you let it do all the hard work for you. Twitterfeed shares content to Twitter, Facebook, Linkedin and other platforms automatically, saving you time and effort. (meaning there’s time for creating more good content not to watch more episodes of Dr Phil on the television…)

It is also worth using programs such as Hootsuite and Buffer to schedule tweets to promote your posts at a later time to ensure you cover different worldwide time zones. When you go to sleep in the US & Canada, people in the UK are just waking up! Covering different time zones will give more people the chance to see your content.

image-1

2 – Add A “Share this” link to every post

Have you ever been on a blog and noticed the blogger has their social icons and a “share this” link at the bottom of every post? Well that’s because they’re pretty savvy when it comes to sharing their content. That blogger is encouraging their readers to share their content for them meaning more people see it across different platforms. You could do your blog a huge favour by adding one of these social bars to your blog. Blogger offers an ‘add on’ for free and WordPress also have several plugins for this such as “Ultimate Social Media Icons” which will make things much simpler for you to implement.

image-2

3 – Use The Blogging Community!

Bloggers are a supportive bunch and as long as you support them, they are quite happy to return the favour. Here are a few ways to use the blogging community to your advantage:

  • Comment on other blogs. This is something we have covered in previous blogs but it’s still a really good way to share your content. If you comment on other blogs with a relevant comment and drop your link at the end, that blogger and other commentors are more likely to visit your blog. Here’s an example of a good comment to leave:

“Please tell me this skirt is available to buy in the UK? I really want the red version to wear for my Christmas party. You look amazing in it! (insert your blog link here)”

By adding this kind of comment, you have asked a question (meaning the person is more likely to visit your blog to reply) and you’ve made the comment personal to the content proving that you’re not just looking to drop your link.

  • Join Twitter Chats! Every day different twitter chats are ongoing using different hashtags such as #lbloggers #fbloggers #bdib and #bbloggers. Hundreds of bloggers (and brands) join in these chats and talk to other bloggers and share each others content to their followers.

Joining a chat is really simple and anyone can do it. Just search on Twitter for one of the hashtags to see when a chat is live. You’ll be surprised at how many visitors you receive and also by how many blogger friends you will make!

3 – Competitions

Again, something else that has been touched on previously is competitions. Running your own competition on your blog is a fantastic way to share your content and encourage visitors. You don’t need a huge budget to run a competition, anything from a gift to a voucher works well and is welcomed with open arms on social media. In fact, it’s a visitor gold mine.

If for example you have a $20 voucher to give away, then write a post about the voucher on your blog and share it on social media encouraging your followers to “follow” and “retweet” your content. This method will literally have your content seen by thousands of users which will encourage more people to follow your blog. If you run a competition once per month, as an example. You are likely to see a decent increase in visitors and content sharing.

4 – Search Engines

Waiting for your new blog post to be picked up by the search engines can have you waiting for months on end. If you want Google, Bing and other search engines to pick up your content quickly, it might be worthwhile manually submitting your content. It’s really quick and easy to do and if you add the Bing and Google submission tools to your favourites as part of your blogging routine, it will quickly become something you automatically do. Search engines might still take some time to rank your content using this method but it is definitely worth trying out.

5 – Summary

To summarise, sharing your content is probably equally as important as creating good content. Using word of mouth is great for telling people when a new shop has opened in your area, or to let people know that there’s a new yoga class opening but not so effective for letting people at the opposite side of the country (or even the world) know about your latest blog post, which is why these methods for sharing your content are so important.

If you have any tips and tricks to tell us, we would love to hear from you! Please feel free to comment below or tweet us at @purelysocialtip
.

A Beginners Guide To Periscope

beginnersguidetoperiscope

You’ve probably heard the buzz going around about Periscope and wondered what it was or if there was any point in trying it out.

Our take? You should at the very least check it out and see if there are any innovative ways you can apply it to your business (any public platform is a potential advertising platform right?). But, there’s no need to rush into it just yet. Think of it as more of an appetizer than a main course. You can use it in addition to your other platforms, but it’s not very substantial on its own.

So, What is Periscope?

Periscope is a video-sharing platform developed by the masterminds at Twitter. As with most of the other social platforms, Periscope comes to you mainly in the form of an app. The main difference between Periscope and other video sharing platforms like Youtube, Snapchat, Meerkat or Skype, however, you can share what is happening at that very instant with your followers. If you’re skydiving, for example, you could broadcast it with your followers whilst you’re doing it. (Although we wouldn’t recommend bringing your phone with you while jumping out of a aircraft, you do have the capability to broadcast it should you choose to.)

How Can You Use Periscope For Business?

There are several ways that you can utilise Periscope for your business whether that be a shop, blog, or a treatment service. There are a few ways you can use Periscope to help your business.

Live Demonstrations

If you have a treatment or service style business, you could instantly broadcast an example or live demonstration of it. This could also work well in the beauty industry where companies could stream makeovers to show examples of their work.

Live Q&A 

Everyone feels safe when a ‘live chat’ option is available on a website for customer enquiries. Now you can take your business to the next level by offering a Live Q&A session once per week (as an example) where users could send you their enquiries and you can answer live on camera.

Data Sharing 

If you work with people in different locations, Periscope is perfect for keeping in touch with employees and colleagues. For example, you could talk your colleague through a customer issue or stock enquiry. You could also arrange a staff meeting live on Periscope (whilst you lie on the beach and enjoy your vacation – bliss!).

Advertisements

You can also use Periscope to run instant promotions for your followers – for example – you could offer 20% off exclusively to your Periscope followers and let them know in a live Broadcast. Not only does this increase sales and attract new visitors, again it is a new way to interact with your customers.

GETTING STARTED

periscope

How Do You Set It Up?

Periscope is fairly straightforward to set up. You just need an iOS or Android equipped device and around ten minutes of your time to get started. Here is a step-by-step guide on getting started on Periscope:

  1. Download the app

Head across to the Periscope website from your smart device and download the app for either iOS or Android. The download is free and should only take a few moments to complete.

  1.  Sign In

Sign in using your Twitter username and password (it’s quick and easy to create an account if you don’t have one already). Then, you can follow any users you wish. We suggest following top influencers in your industry for starters.

  1. Create Periscope ID

We always suggest that you keep your username consistent across platforms. This isn’t always possible, but stay as close to it as possible so your followers know that it’s you!

How to Broadcast?

IMG_0064

via Simply Measured: “How to Create the Perfect Post on Any Network”

Making a broadcast is just as simple as setting up the app was.

  1. Simply tap the icon at the bottom of your screen to start a broadcast
  2. Give your broadcast a title – for example “Charity Skydive”, or “Staff Meeting November 2015” to let your followers know what you’re doing.
  3. As soon as you are ready to hit the big screen, hit “Start Broadcast”

Simple, huh?

As with all social media and advertising platforms, there are key things to remember when promoting your brand:

Plan Ahead.

If you are hosting a broadcast to the public, having a script on hand will make you much more prepared. Write points down on sticky notes and place them in a convenient area in front of you during your broadcast to ensure you stick to the topic and stay on track. This will cut down the time and will stop your viewers from becoming bored.

Be Punctual.

If you advertise across Twitter or Facebook that you will be starting a new broadcast at 6.30pm, make sure you are broadcasting at the right time. You’d be amazed at how many people are instantly turned off if you are late to something. It can look unprofessional and will not promote your business in the way you had hoped.

Timing.

On the subject of being punctual, as with all social media, timing is key. If you broadcast at 1am on a Tuesday night, the likelihood of many (if any) users tuning in to your broadcast is slim. If you are hosting a business meeting with your colleagues, then broadcasting during working days and hours is the obvious time.

If you are broadcasting to your followers about a new beauty or holistic treatment then chances are people might be more inclined to tune in during the evening after work hours and after children have gone to bed. Ensure you avoid “meal times” and “travel times”. As far as what day to broadcast, ensure you consider when your target audience is available.

Lastly, always ensure you promote your broadcast on other social media platforms prior to your broadcast. Let your Twitter, Facebook and Instagram followers know at least 24 hours in advice and consider using a hashtag at the end, for example:

“New Periscope Broadcast with exclusive news and promotions at 6pm on Wednesday #purelysocialmediaperiscope”

This will encourage your followers across other platforms to follow you and tune in to your broadcast.

Be Descriptive.

Ensure that the title of your broadcast is descriptive and “hooks” the followers. Explain what they can expect and hook them in with something that will make them stick around, so for example:

“Tune in for this live demonstration of (insert treatment) and get a chance to WIN a treatment of your choice!”

Here you are explaining what your broadcast is and also entices your follower to tune in until the end by offering something for them. (Muwahaha, sneaky right?)

Interaction.

The great thing about Periscope is that users are able to send you questions or comments while you are broadcasting. This is ideal for customers and for interacting with colleagues. Engagement in key! People love to have a personal response to their queries, which is why responding to your followers live during a broadcast will encourage followers to watch more.

Finishing Up.

Once you have finished your broadcast, your followers will be able to watch it for 24 hours once it has ended. You should take this opportunity to promote the broadcast on social media once more.

At the end you will be given a breakdown of:

  • How many people viewed your video
  • How many people “Loved” your video (You can “heart” a broadcast)
  • How many people re-played your video over the 24 hours

This information will help you to see which broadcasts worked better than others and will let you see how different timed broadcasts work.

Final Verdict?

Periscope is definitely a useful tool for your business regardless of what type of business you have. The app is quite new to the social media circuit, but is definitely packing a fair punch. Periscope is set to stick around for a while, so getting the hang of it now will be an advantage to you.

If you still need more help getting your Periscope account together, or you need more information on how it can be beneficial to you, check out this article, or read their blog.

As always, you can feel free to leave us your comments below or tweet us @purelysocialtip