 Regardless of your industry, Pinterest can increase traffic to your website. Obviously Pinterest works better for more visual businesses like those in the wedding, fashion, food and travel industries than what it does for accountants. But even with accountants, you can still pin helpful content that’ll engage with your target audience. For example, pins which relate to money saving and business tips will provide helpful content to business owners which may/may not be in need of a new accountant.
The way to make Pinterest work for your business is by helping and inspiring your prospective reader/client in order to direct them to your website. It’s not about building followers on Pinterest – it’s about using content to attract readers who will get your brand, love what you do & build loyalty to buy from you. Here’s how to get started:
Create a Pinterest Business Account
With a business account you get access to analytics, rich pins (we’ll discuss these in point 3), and the ability to promote your pins. If you’ve not already got a Pinterest account, click to create a business account. If you have a personal account already, click the following link to switch your personal account to a business one.
Verify Your Business Account
Once you have a business account on the go, you can now verify your Pinterest account. By verifying, you’ll be able to monitor the web traffic coming from your pins. Here’s how to verify using the metatag Pinterest generates:
- Go to your profile and click Account Settings.
- On profile, in the Website field, enter your website URL and click Confirm Website.
- Go on to the next page and see the metatag to put in the <head> of your website.
- If you’re using WordPress, login to your website and go to Appearances,then Editor and in the right hand sidebar click “header.php”
- Within the header.php file, copy and paste the metatag Pinterest gave you. Insert this code in between the <head> and </head> tags in the file. Click to update file and it’s all go!
Apply for Rich Pins
Qualifying for Rich Pins is another advantage to owning a business account. As well as making your business look more credible, Rich Pins enables you to provide more information with your pin. Currently, Pinterest offer 6 formats of rich pins; articles, recipes, places, products, apps and places.
In this tutorial, we’ll use rich pins for articles to explain how to enable rich pins for your account.
The easiest way to set up rich pins is by using Yoast SEO Plugin for WordPress. As opposed to manually adding Pinterest’s metatags to certain places on your site, Yoast SEO does it for you!
To install Yoast SEO click Plugins, Add New and then Upload Plugin. Upload the .zip file for Yoast SEO and click Install Now. Activate the Yoast SEO plugin by clicking Activate in the Installed Plugins section on WordPress.
Next, go to the new SEO section of your left sidebar. Click SEO and then click Social. Go to the Facebook section and tick the Add Open Graph Meta Data and press Save Changes. Once completed, click the following link to enable Rich Pins by copying a link to one of your blog posts by scrolling to the bottom of Pinterest’s rich pins validating tool.
NOTE: It can take up to 7 days for Pinterest to approve your rich pin application.
Organize Your Boards
In order to engage and gain a following on Pinterest – you need a flawless profile with boards that will attract your prospective reader/client.
Your first 8 boards are most visible. The first 4 are the most important. They show off your brand, show what you’re interested in and show what you do. From this, they’ll get an understanding of what you’re about.
One great way to create an eye-catching Pinterest profile is by coordinating the board covers and name titles. In the world of Pinterest, jumbled up images and mismatched colors won’t do. Your profile needs uniformity. Do this by implementing your brand colors on the board covers and having a style for your board titles. Each board also needs a relevant description that includes keywords your target audience will be using in their search for inspirational content.
When organizing your boards think:
- Who is my target audience?
- What content is my target audience looking for?
- What do they love?
- What content will help them?
Here is an example of a Pinterest profile which engages with its ideal audience:
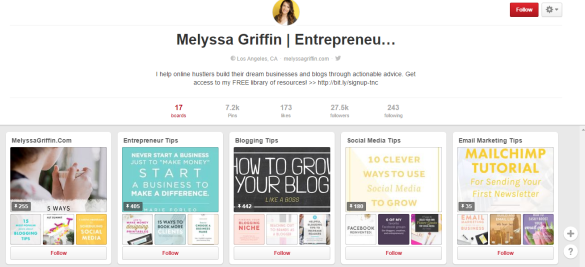
Melyssa helps bloggers and creative entrepreneurs build their businesses using their blogs, social media and email marketing. Her board is simple, matches her brand colors and most importantly – her boards are relevant to what her target audience will be searching. For example: entrepreneur tips, social media tips, blogging tips + email marketing tips.
Create ‘Pinworthy’ Images for Your Blog Posts + Other Web Content
Photography
If you shoot your own photography then great, you’re onto a winner! Your photography will be unique & help form your brand. But, don’t worry, if you don’t take your own photographs, there are heaps of websites that provide beautiful stock photography that is blog and pin-worthy (some are free, too!). Here are a few we recommend: Unsplash, Death to the Stock Photo and Pexels. Take note that tall thin images work best on Pinterest.
The Graphics & Text
You have the photography – now you need the graphics. You can use design software like Photoshop and Illustrator, but if you don’t have the budget, Canva is amazing for creating your own eyecatching pinworthy images for your content (like the feature image for this post. You can add your headline, change text size, add icons, adjust brightness and play with color. For inspiration for the most pinned images on Pinterest, check out this link to find out more.
When it comes to adding your text, your headline needs to grab people’s attention at one glance – so the text needs to be clear and simple.
Join Group Boards
Joining Group Boards is a great way to build your following, show off your content, interact with industry leaders and prospective clients in attempt to increase the traffic to your website. Pingroupie is an amazing website which allows you to find Pinterest group boards which are relevant to your brand.
Filter your boards by ‘Collaborators’ – ones with higher members are more likely to accept.
You NEED to follow the owner of the group board in order to be accepted.
You may need to email the group board owner in order to be accepted.
Once accepted, try to pin 1-4 images to your group board in a day. Anymore than that then you might appear spammy. Build a good reputation by repinning other members content from the group board.
Curate Great Content for Your Pinterest Boards
In addition to pinning your own content, repinning content helps attract your target audience too.
Curate great content for your boards by following people in your industry, liking, commenting and re-pinning their content onto your boards.
The most likely content to go viral on Pinterest are how to posts, top resources, recipes, guides and checklists. Ensure your pinning seasonal and on-trend content too.
TIP: Pinterest is more likely to recommend your board if it contains lots of popular pins. Once a week go through your boards and delete the pins with low re-pins. This’ll make sure your boards appear to only show amazing content people love!
Schedule Your Pins
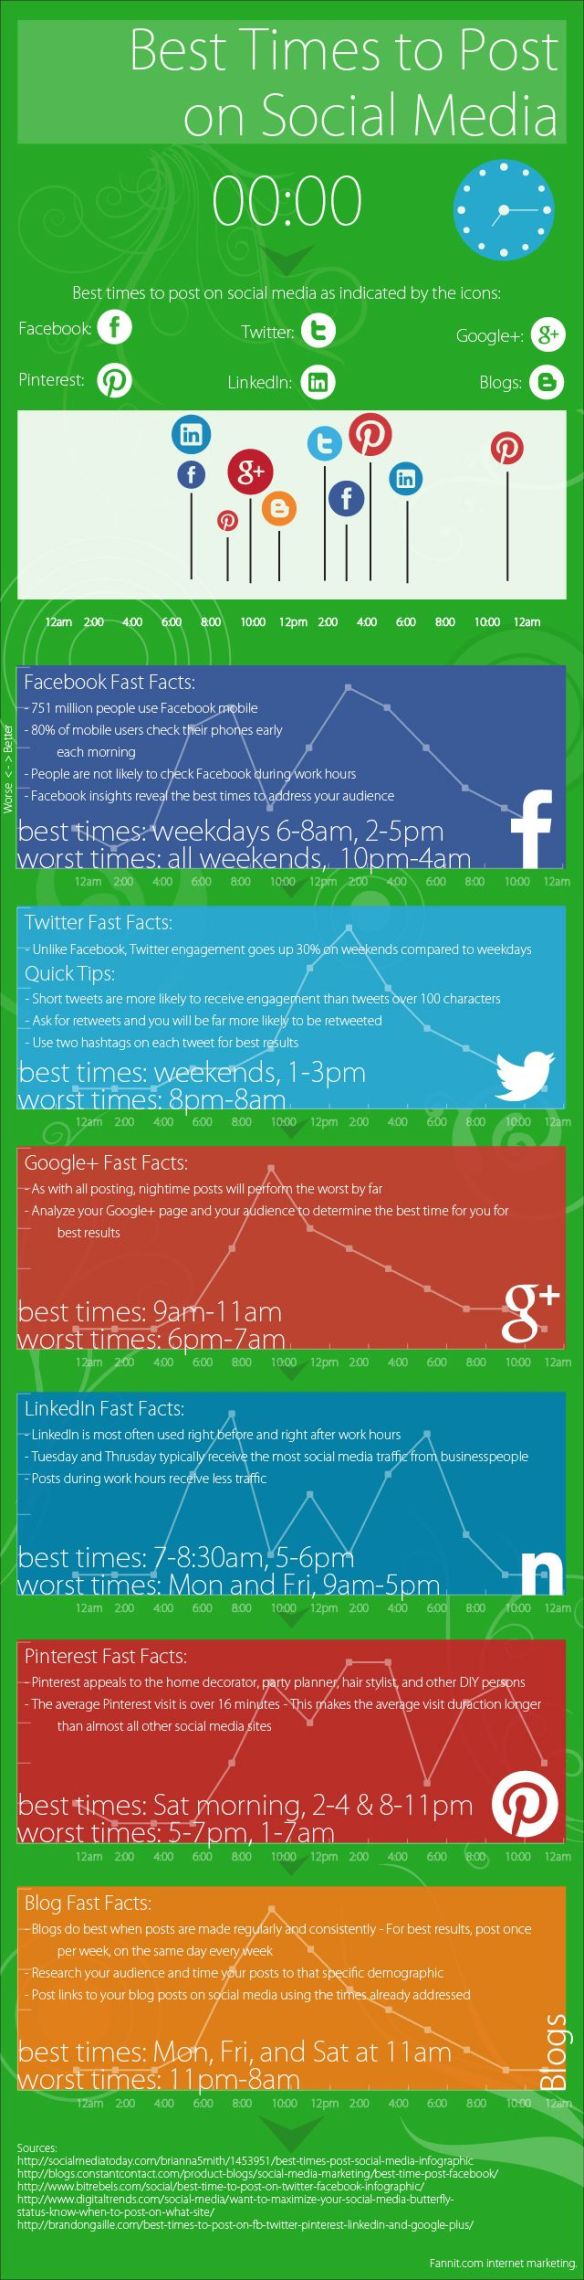
Scheduling pins helps save you time + allows you to schedule lots of images to be pinned to your board. Unlike most social media platforms, there are no popular times on Pinterest, Pinterest just likes to see lots of fresh popular content being pinned to your board daily. We recommend using ViralTag and BoardBooster to schedule your pins in advance.
If you have any questions or suggestions, then feel free to comment below or tweet us @purelysocialtip.


