Google Adwords: Step By Step Guide

IMG_2510Google as we all know, Is the biggest search engine in the world, but Google has many more services other than it’s search function. Google Adwords is a service where people like you and I can advertise our business. Blog or service, at the top of search result pages.

Of course, having a budget is essential for running an Adwords campaign, however, your budget needn’t be huge. For example, Google regularly offers vouchers for adwords. If you deposit $25 into your account, Google will give you an extra $75 worth of advertising to work with.

A lot of people reading this might be wondering how beneficial Google Adwords is to your website, well I can personally assure you, that a $50 campaign can take your article/service/blog/shop from having 0 visitors, to having 1000 overnight if you so choose.

Have we pricked your attention yet? I thought we might have!

So first thing’s first, let’s set up an account (it’s free to set up and will only take 2-3 minutes of your time.)

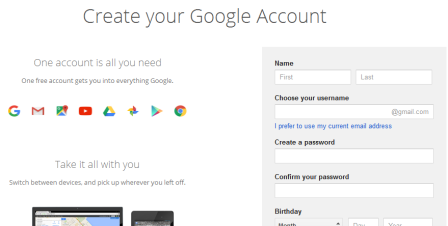
1 – Create a Google Adwords Account

First off, head on over to Google Adwords and click on “Start Now” and enter in your details – you will also be asked to confirm your email address. Once you have clicked the confirmation link in the email, head on over to adwords.google.com to sign in to your account.

2 – Decide On Which Locations You Want To Advertise To

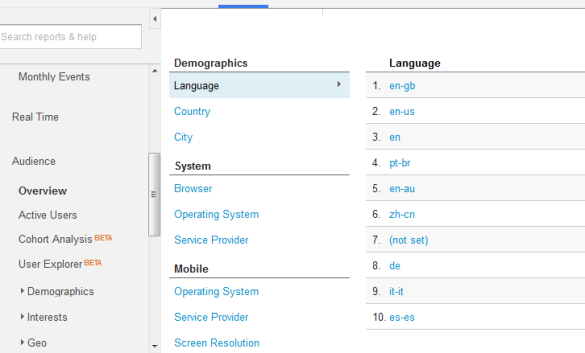
Next up you need to decide on which part of the world you want to advertise to, which is where the analytics we discussed in the last article is so important. So for example, if the majority of your visitors are from the UK but you’re trying to sell a product in the USA, then you might want to advertise in the US. You can even narrow it down to specific states, cities and towns if you have a local business.

  • Click on “Create Your First Campaign” Button.
  • Click on “Campaign Settings” and then “Audience” before selecting which regions you would like to advertise to.

3 – Set A Budget

Moving onto the next part of creating your ad: deciding on a budget. Google will of course make budget suggestions but this is entirely up to you. You can set a daily budget that you’re happy to spend, whether that be $0.10 or $10 it is entirely up to you. You only pay when someone clicks on your advertisement, so each click might cost five cents meaning that in a $1 daily budget, you could receive 20 clicks (and 20 potential new customers!) from spending that dollar. You can change your budget at any given time and Google will never spend above the daily limit. Your ads will stop appearing in the search once the limit has been reached.

4 – Control Your CPC (Cost Per Click)

When you set your budget, so for example $1 per day, that $1 will consist of several clicks. It’s up to you how much you wish to spend on each click. The higher you bid, the more likely your ad will reach new customers. With that said, you are in the driver’s seat with this! You can bid whichever amount you like, many people starting out bid low (For example 10 cents) which will get you 10 clicks throughout the day.

Click on “Bidding And Budget” to change your CPC or to set ‘automatic bidding’ where Google bid an amount they think is most beneficial to your ad. Personally, I like to set my own CPC which can be changed at any time.

5 – Create An Ad!IMG_2511

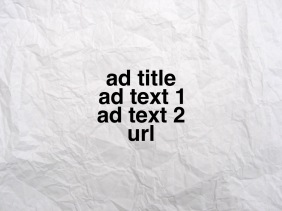
Creating the ad itself is the most important part of the whole process. This is what your customers will see before they even see your website so it’s important to be appealing.

– Ad Title

This is your title so for example, if you had a bargain beauty product business, then your title might be “Buy Bargain Beauty Products” or “Find Cheap Beauty Products”

– Text Line 1

Be sure to include important keywords here as these keywords, when searched for, will appear in bold making the ad more likely to be clicked on as it appears most relevant to the user. An example of text in here could be “Bargain Beauty Supplies for Professionals”

– Text Line 2

This is where you make yourself unique and sell your service. For example: “Click To Save 20% Today” This is also known as a ‘call to action’ where you encourage the visitor to click

– URL

Simply enter the site’s URL for example www.yourwebsite.com

6 – Keywords

This is what people will type into the google search to find your ad. This is where it gets a little bit more complicated. However fear not, for I am equipped with all the tools and information you might need.

First thing’s first, don’t worry about getting it perfect straight away. You can easily delete or edit certain keywords if you find they aren’t working for you.

IMG_2515Here are my tips for choosing the right keywords:

  • Be Specific. Using keywords such as “Beauty” is too general and will likely show dozens of ads meaning yours is less likely to appear. I would recommend choosing “Beauty Supplies For Professionals” which Is more specific and niche to your website and will target customers who are looking for those specific things.
  • Start out with 4/5 keywords or phrases. You can then monitor which ones perform better and decide on which ones to remove and new ones to add.
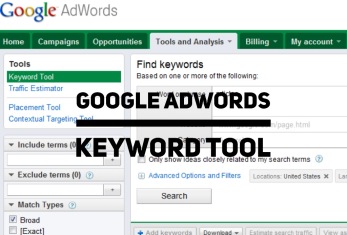
  • Use the keyword tool! This tool is literally priceless and is completely free to use. Using this will show you how many people are searching for a specific keywords or phrases, how much competition there is from other advertisers and how much Google suggests you spend on each keyword.
  • Analyse your ad after a few days. Once a few days have passed, log back in and check how the keywords have performed. Google will show you how many times the ad appeared and how many times it was clicked on.

7 – Billing

This is the part no-one likes – parting with money! Haha! Here is where you enter your billing details. Here’s how to do it:

  • Click on “Billing” and then “Billing Preferences”
  • Select a payment method. You can choose between:
  • Postpay (automatic payments): American Express, JCB, MasterCard, Visa, Bank account payments (US bank accounts only), and debit cards with a MasterCard or Visa logo
  • Prepay (manual payments): American Express, JCB, MasterCard, Visa, and debit cards with a MasterCard or Visa log
  • Read and Accept the Adwords Terms & Conditions
  • You can also redeem a voucher here if you have one under “Promotional Codes”

8 – Done!

You’ve now completed setting up your adwords campaign. You can of course, add more, edit or delete your ads by signing into your account and adjust your budgets to suit your requirements. If you have any problems, there are dozens of online support pages at support.google.com

Alternatively, of course you can leave any enquiries in the comments below or tweet us @purelysocialmedia

Thanks so much for reading and I really hope this has helped you.

Until next time!

Holly x

Google Sandboxing: Explained

IMG_2733
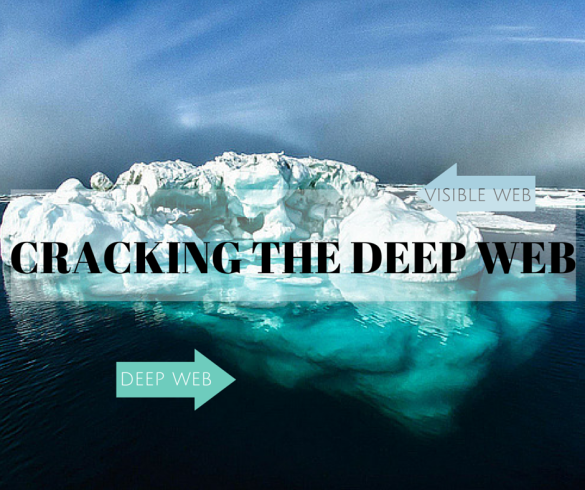
As you will already know, Google is a great but often complicated internet giant. We’ve explained adsense and Adwords already, but today we’re talking about one of the most commonly queried Google topics on the web: Google Sandboxing.

What Is Google Sandbox?

Because you have an online presence, it’s important that you have a good SEO standing and will want to understand Google Sandbox. You’ve probably read the horror stories online. So what is Google Sandbox?

Put simply, Google Sandbox is a filter that Google add to new websites or domains that hope to appear in the search engine for specific phrases or keywords. The Sandbox effect exists to stop spammers from manipulating their way into Google’s search engine by incorporating all of Google’s guidelines.

While Google themselves have not confirmed the existence of Sandbox, many SEO experts believe in the ‘theory’ and Google have hinted at it. During Sandboxing, your website may not appear at all on Google’s search engine for up to 6 months (although, the typical amount of time is 3-4 months).

So now that we know what Google Sandbox is, let’s move onto some frequently asked questions.

Which Websites Can Be Sandboxed?

Any website can be sandboxed. After extensive research over my time as a blogger (five years), I can personally say that whether you have a new website or an already established website, your site could be sandboxed. I’ve seen it happen dozens of times. With that said, you’re more likely to be a victim of the sandbox effect if you are competing for hugely popular keyword searches.

How Can I Avoid Being Sandboxed?

While there are no guarantees that your website won’t spend sometime in the internet jail that is Sandbox, new websites in particular should avoid using popular keywords and phrases on their website and gradually introduce them if they are truly important to your website. Sandbox was (supposedly) introduced in 2004, so if your website dates back before then, then you will likely avoid it.

I would also recommend adding new content to your website consistently to let Google see that you’re serious about your website. It might not stop you from being put in the sandbox, but it might shorten the amount of time you spend there (normally 3-4 months, no more than 6 months).

How Will I Know If I’m In The Sandbox?

It’s quite easy to find out if you’ve been sandboxed. You can go and search on Google to find out where your site is ranking. Alternatively, you can use a tool such as http://pixelgroove.com/serp/sandbox_checker/ which will tell you if your site has been penalised, de-indexed or sandboxed.

Will Using Google Services Stop Me Being Sandboxed?

Google is pretty clever and they can see straight through this kind of thing. Using Adwords and Adsense are believed by some to be the answer to their sandbox prayers but unfortunately, it makes little to no difference if you use a Google product in terms of Sandboxing. With that said, if you have a blog and choose to build your blog using Google’s ‘Blogger’ platform, it has been suggested by some SEO experts that you are less likely to be sandboxed. With that said, this is a pretty controversial topic and many SEO experts vehemently disagree with the theory and insist that using any Google service would neither help nor hinder with the Sandbox effect.

Should I Still Be Using Popular Keywords?

Yes! Many people make the mistake (myself included I should add!) of changing their website all together and focussing on less popular keywords. Some have even changed the topic of their website altogether and in some cases, people have stopped working on their website completely. This of course is not what Google wants to see. If you drastically change or stop working on your website then Google will think it has done the right thing by sandboxing you which will result in very poor rankings once the sandbox effect is complete. Ideally, I would recommend consistently working on your website, and incorporating more keywords or phrases that are less popular than some of the big hitters. Don’t remove the popular ones, just add some more.

Tip: Don’t go keyword stuffing either. Google will think you’re trying to get noticed from all angles. I know, I know, you can’t win!

So what are the Do’s and Do Not’s of Sandboxing?

IMG_2734

DO NOT:

  • Aim to be number 1 in the search engine if you’re a new website. Using popular keywords or phrases such as “cheap flights to New York” in your website will automatically show red flags to Google.
  • Change the theme of your website. Going from being a beauty website to changing it to a travel website overnight because you’ve been put in the sandbox will only mean Google ‘proved’ your website was a spam site. Let Google see that you are consistent and chances are your time in the sandbox will be short.
  • Cease working on it altogether. If you suddenly decide to stop working on your website while you are in the sandpit, chances are that once your website starts to re-rank, you will rank poorly.
  • Keyword Hack! If you add a lot of keywords and use them throughout your site, Google will just think you’re trying to hit it from all angles and will either poorly rank you or throw you in the sandbox.

DO:

  • Publish your website before it’s ‘perfect’. If Google see’s your site is gradually being worked on and you have no keywords, they are less likely to sandbox you because you don’t appear to be a spammer with a set site format that is automatically published.
  • Add less popular keywords and phrases – so as an example, rather than using “Cheap flights to New York” try “Low cost flights from Dallas To JFK” – the search phrase is still hugely popular but not as broad as the original one mentioned.
  • Be persistent. If you continue to put up new content and source inbound links, Google will see that you are a real person rather than a bot or spammer. If you still end up in the sandbox, chances are your time there could be short and once you are out of it, you will rank well.

Most Importantly

Remember that thousands of websites are in the same position as you are and you can still drive traffic to your website using inbound links and social media. Don’t give up on your website because you have been sandboxed or have poor rankings. A website can be built overnight but being maintained and growth is something you will always have to work on.

To Summarise

I hope this guide on Google Sandboxing has been useful and informative for you. If you have any questions about this, feel free to leave a comment below or tweet us @purelysocialtip

Until next time..

Holly

Launching a New Product or Service? Here’s How to Create a Content Marketing Plan to Reach Your Audience + Win Sales

How to Create a Content Marketing Plan

Nobody likes a cold caller or an in-your-face salesman that doesn’t let you get away. When it comes to investing in a product we want choices. We like to build trust and find out how it works. In a world where marketers can easily put their product in front of you on Facebook, through Google or pop into your inbox – the “hard sell” can quickly be deleted and ignored. To promote a new service or product, we need to engage, show you’re an expert and provide value. And – that’s why content marketing is key.

Here’s How Content Marketing Will Grow Your Business

Provide value

We love getting as much as we can for our money. And – as a species, we LOVE freebies! And, that’s why offering free downloadable guides and resources work so well. You’re giving your potential client much more than a product or a service. You are proving that you are the solution to their problems.

If your audience has spent time reading your blog or chosen to download a guide, they know you know what you’re talking about. And before getting told about your new product or service, they trust your brand.

Enhance your SEO

In addition to building trust, content marketing ticks all of the SEO boxes too.

Say goodbye to the‘black hat’ SEO days.

Google now sees good, helpful SEO optimized content as the #1 ranking factor your website. The more helpful content you publish on your website, the more search engines indexes you.

And – the more your content is found on a search engine, the more chance you’ll have of connecting with a potential client.  

Engage with your audience + start conversations

By default, we engage with people and emotions. Showing our personality through the content we post on social media, blog posts, emails, online forums – we build meaningful relationships. Our ability to interact is what builds customer loyalty and wins a sale.

Become an expert

We’ve touched on how we need trust to make a purchase.

If you’re making a claim that you’re social media services will increase sales. You’ve gotta give evidence for that skill set. Through your content marketing you can demonstrate your ability to solve problems. You can feature case studies and prove your products/services are worth investing in by posting testimonials.

Using a combination of content marketing strategies you can provide rich information that’ll build your authority and put you ahead of your competitors.

To gain exposure and build as much hype around your product launch as possible, here are a few ideas to connect with your audience and get your name out there:

  1. Get Blogging!

Your blog should be your first point of call. As well as boosting your SEO, your blog posts will be the platform for the rest of your content marketing to build on.

Your blog posts don’t need to explain your new product or service, they just need to include keywords, spark interest and get your readers engaged with the advice you are publishing.

Brainstorm blog post ideas around the topic of your product/service that’ll be published in the six weeks prior, during and after your launch following this rough timeline and structure:

Blog Post 1: 2 weeks prior offering a free content upgrade to collect email addresses (after launch – update this post with banner images and product/service details)

Blog Post 2: 1 week before (after launch – update this post with banner images and product/service details)

Blog Post 3: On the day of launch offering a free guide based around the theme of your product/service to build your email subscribers

Blog Post 4: 1 week after launch

Blog Post 5: 2 weeks after launch including a free worksheet based on the theme of your product/service

Blog Post 6: 3 weeks after launch

  1. Create Opt-In Freebies to Embed into Your Blog Posts

As detailed above, you’ll see that we recommend creating free downloads to offer to your readers in Blog Posts 1, 3 and 5. These ‘lead magnets’ will get people signing up to your mailing list so you can get to work on priming  your audience for your product launch.

Follow our guide to designing an email sign-up form that can be embedded into your blog posts so you can automatically send out your freebie.  

  1. Set up an Email Sequence that’ll be sent to Your Freebie Downloaders & Mailing List

Email marketing is a great way to prime your audience for a service or product launch.

  • Brainstorm + write an email sequence of around 6 emails.
  • Send out 2 emails before launching.
  • And – send your mailing list 4 emails on or after the launch.

Here’s an example of an email sequence to your mailing list or after your freebie is sent out:

  1. Advice surrounding the theme of your product/service.
  2. Show how you/your business benefited from your product/service – the more personal the better – it’ll show what you’ve learnt from your journey and help your audience connect with you.
  3. Product launch email – feature case studies, your USPs and briefly mention your product/service. You may also want to link to recent blog posts related to the topic of your product/service.
  4. If you’re planning a webinar or Q&A on Periscope – send an email out to promote what they’ll learn from you & mention what you’re clients say.
  5. Pitch your product/service – mentioning an exclusive discount to email subscribers.
  6. Mention that it’s the last 24 hours of your discount and briefly go over the benefits of your product/service.
  1. Promote Your Freebies on Facebook Ads

Everybody loves a free gift.

As well as creating a post to promote your product/service launch, use Facebook Ads to promote your free downloadable guides.

People are more likely to trust a business that offers them free information in place of an advert of a service you’re offering.

In your Facebook advert, use your email sign-up URL to send out the freebie to your audience. You can find out how to find the email sign-up page URL in our How to Create an Email Newsletter Guide.

By creating a Facebook Ad, you can hit your demographic, offer a freebie to provide valuable helpful content that’ll show off your expertise and collect email addresses to add to your mailing list.

Through your mailing list you can start conversations with your potential customers, promote your recent content in your email newsletter and hopefully sell to them further down the line.  

  1. Facebook, Twitter + LinkedIn Posts

Write posts to direct traffic your blog posts and your new product/service for each social media network. For each link we recommend writing:

4x Twitter Posts

2 x Facebook Posts

1x LinkedIn Post

If you’re a member of a Facebook or LinkedIn group, post your content in places where it will be of most use.

  1. Guest Blog!

An amazing way to reach your target audience AND improve your website’s SEO is by guest blogging. Here’s how to promote your product/service through guest blogging:

  • Firstly, research businesses/blogs/websites which has a similar target audience to yours.
  • Email them to see whether they accept guest posts.
  • Brainstorm blog post ideas surrounding the theme of your product/service.
  • Arrange to publish your guest blog around on or after your product/service launch.

Find out why publishing content on sites is useful your website’s SEO in our article: A Beginner’s Guide to SEO.

  1. Upload Images to Instagram and Pinterest to Promote Every Blog Post

Create a pinworthy image for every blog post you create. Pin this to your boards + shared boards to get as much traffic as possible.

On Instagram, publish images featuring a question that relates to the content of your blog post. By posting these images to your Instagram with relevant hashtags you can hopefully kickstart a conversation with your potential audience.

  1. Lead a Q+A And/Or Tutorial on Periscope

An amazing way to show your expertise and connect with your potential clients is by using Periscope. Here you can host a livestream of a tutorial or Q+A related to your product or service.

What’s best is that your audience can interact with you and other watchers in the chat running at the same time as your live stream. Unlike educating your audience through a blog post, Periscope allows you to connect with your audience as well as your audience engaging with you.

You can briefly mention the benefits of your product/service and direct watchers to your website to find out more.

New to Periscope? Find out all you need to know in our Beginner’s Guide to Periscope blog post.

  1. Host a Webinar

Webinars are an awesome platform for generating revenue – they’re becoming increasingly popular too! Here are a few ideas for your webinar:

  • Think of one of your FAQs or what your potential client would like to learn from you. Use this idea for the basis of your webinar.
  • You can host the same webinar 2 or 3 times.
  • Pitch your product/service at the end of the webinar.

Questions? Comments? Leave them below or reach out to us on Twitter! We love to engage!

Google Analytics: Step By Step Guide


IMG_2363

As a lot of you will know, Google has a host of tools available for web developers and bloggers on everything from Analytics, to sharing documents, Adsense and even Adwords where you can advertise your site at the top of Google search pages.

Today, we’re starting with Analytics which allows you to track everything from the age and gender of your visitors to how a specific post has performed on your website.

So let’s get started!

Setting Up An Account

googlesignup-1

  1. Head on over to https://accounts.google.com and create a simple google account using your
    email address and a password. If you already have a google account for Gmail or Youtube, you will be able to sign in with this.
  2. Once registration is complete, head on over to google.com/analytics and click on “sign in” on the top right corner, before selecting “Google Analytics” from the drop down menu.
  3. You will then be redirected to a new page where you will be asked to “sign up”, click on this.
  4. Enter an account name of your choice, your website and a few other straight forward questions. I would recommend leaving all of the “Data Sharing Settings” ticked as recommended by Google themselves. However, do have a read through them and decide for yourself before clicking on “Get Tracking ID”
  5. Accept the terms and conditions once you have read them.
  6. You will then be issued your verification code which you will need to insert into your html, PHP or Tags of every page you wish to use analytics for on your website. (I recommend the index page first and foremost but ultimately the whole website.)
  7. Once that is done, your site is verified and you can move onto using Analytics!

Okay so now that you have set up your account, it might take a day or so to show any information. Once this appears, you’re ready to start viewing your website or blog’s analytics.

“Analytics” basically refers to visitor information such as:

  • How many people visited your website or individual page
  • What time they visited
  • How they found you (if they clicked a link on social media or search engine)
  • How long they spent viewing the content (and if they clicked on links etc)
  • The age and gender of the visitor0
  • Location of the visitor (US, UK, Australia, Europe, China etc)

A lot of terminology on Google can be confusing if you’ve never used Analytics before, so I thought before we went any further that I would explain some important ones.

  • Sessions – This refers to a group of interactions from one user. A session refers to multiple pages being viewed, social interactions and events.
  • Users – An individual who Is viewing your content
  • Page Views – How many pages your visitors looked at on the site.
  • Pages/Session – How many pages were viewed during a session
  • Avg. Session Duration – The amount of time spent on the site
  • Bounce Rate – The Percentage of visitors who leave your site after viewing just one page.
  • % New Sessions – percentage of views from new visitors to your website (rather than recurring)

So there you have all of the Google Terminology explained. Now, let’s move on to navigating through your Analytics control panel.

Once you’ve signed in to your analytics account, you will be taken to a page that looks like this:


image-2 (1)


So let’s just talk through some of the navigaton on the left side where you will see options such as Dashboard, Shortcuts etc

  • Dashboards

Dashboards basically allow you to create your own “dashboard” where you can view the elements which are most important to you at a glance. For more information on setting up a Dashboard, head on over to Google Help Pages.

  • Shortcuts

Shortcuts allows you to view your most commonly viewed reports straight from your home tab. For more help on Shortcuts, visit Google Help Pages.

  • Intelligence Events

Intelligence Events lets you know about changes in traffic on a daily, weekly or monthly basis. For fore help on Intelligence events, Click here.

  • Real Time

This is addictive!! Say for example you Tweet a link to your followers and want to see how it translates to clicks on your site, then click on Real Time where you will see activity as it happens. It really is addictive to watch. I’ve spent many hours watching people roam my website. #GetALifeHolly

  • Audience

Now this is the most important aspect of Analytics (In my opinion). This is where you find out who your visitor is, where they came from, how they got there, where they clicked, how long they stayed, their gender, age and location and so forth.


image-3


By clicking on ‘overview’ you will be given a brief look at your demographics such as how many visitors you received during a specific time frame. You’ll be given a few different statistics such as Bounce Rate and Pageviews which I referred to earlier. You’ll also be given a list of nationalities of your visitors whether they be viewing from the US, UK, Australia, Europe or otherwise.

  • Active Users

If you look at the navigation on the left again, you will see “Active Users”. To put it simply, Active Users are unique visitors. For me, I use this the least of all the features on the Analytics.

  • Demographics

The Demographics overview will let you know how many of your visitors are male or Female. It will also let you know which age group they fall into which is great for tailoring future content.

  • Interests

The ‘Interests’ section lets you see what interests your visitors have. So for example they might be sports fans, or car lovers. Google is a clever search engine and collects a lot of information from it’s users.

  • Geo

This will show you which Geographical location you are being visited from. This is really handy again for catering content to your main visitors – for example if 7% of your website’s visitors are visiting from Australia, it might be worth referring to Australian issues or events on your website.

  • Behaviour

This basically lets you know what your visitors did whilst viewing your content. You will see how long they spent on the site, which pages they visited, which links they clicked and if they engaged or interacted with you – such as sharing your links etc.

  • Technology

Technology allows you to see which web browsers and internet networks were used to find and browse your website. So for example, this will let you know if the majority of your visitors used Firefox or Internet Explorer.

  • Mobile

Mobile will inform you of which device they used when visiting your website, for example, Tablet, Mobile or Desktop. Google has even listed exact phone and tablet models of your users, so you will be able to see if the majority of your visitors prefer Apple or Samsung products as an example.

  • Custom

This is pretty self explanatory but again, Google give you the option to customise which items you view so you can find it all in one place.

  • Benchmarking

This is a VERY important part of Analytics. Benchmarking let’s you see how your visitors came across your website. So for example, if they clicked on a link in Twitter, found it in a search engine, email newsletter or directly typed it into the URL field. This is important so that you can focus on the traffic sources that give you the highest amount of views.

  • Users Flow

Users Flow let’s you see which page your visitors landed on when they first entered your website and which demographics landed there.

  • Acquisition

This is very similar to benchmarking but is much more streamlined. It allows you to see the referring sites and/search that was used to find your website at a glance.

I think I’ve mentioned everything there is to know about Google Analytics. Feel free to let us know if there’s anything I’ve missed and I hope this has been useful to you – I know that when I was starting out, a guide like this would have made my life much easier!

As always, let us know your comments below or tweet us @purelysocialtip

Until next time!

Holly x

How Personal Should You Make Your Social Media?

IMG_2129

We all have been there – we see a tweet that is borderline offensive but is hilarious and we’ve hit ‘favourite’ before we’ve even thought about the repercussions. As a Blogger of almost five years (and a self confessed social media addict), I can definitely empathise.

I have seen some bloggers go from zero to five thousand followers in a day because of a single tweet. With that said, on the flipside I’ve also seen some businesses go from having 120,000 followers and loosing more than 20,000 followers in an instant because they’ve offended people by being too personal, or by ‘liking’ something that can be disagreed with.

I know a lot of you reading this are businesses looking for advice on how personal to keep your social media and there are also a lot of Bloggers looking for the same information which is why this article will be split into two sections.

The rules for Bloggers and Businesses for social media are very different and so I wanted to keep this clear and individual for both genres.

First thing’s first, let’s talk about it from a business point of view.

1 – Businesses Should Keep It Professional With A Hint Of HumourIMG_2131

The title might seem pretty self explanatory but let me just go into a bit more detail. Businesses, whether you run an online shop or service, are seen as ‘professional’. I would probably expect some Bloggers to say something offensive or using profanity now and again, but I always expect a business to be professional. I don’t really want to see a business sharing their opinions or using profanity. If I am going to spend money with someone, I want to feel safe and know that if I choose to complain to the business, I will be met with professionalism. At the same time, I also want to know that the business is human and has a sense of humor.

2 – So, what is ‘too’ personal in Business?

Here is a list of ‘No-No’s’ for any business on social media:

  • Do not establish any online friendships on a business account
  • Do not use profanity in your statuses.
  • Do not ‘favourite’ or ‘like’ any statuses that contain profanity or potentially offensive statuses.
  • Do not engage in arguments.
  • Do not post any images that were not taken by you or that you do not have permission to use.
  • Do not engage in or post any political, religious or sexual discussions.

3 – What Should My Business Be Personal With

Now that I’ve given you a list of things you shouldn’t do, it’s only fair to give you a list of what to do.IMG_2130

  • Do respond to any messages of complaint or query about an order or otherwise.
  • Do always mention the person’s name in the response (it makes it more personal to the individual).
  • Do always thank users for their message
  • Do keep things light hearted. For example “It seems our website has been enjoying our relaxation products a bit too much! We’re working on getting getting the website working again and apologise for any inconvenience”
  • Do show respect. Be sure to post statuses of respect in regards to the deaths of popular people (celebrities) for example “Rest In Peace Whitney Houston. We will forever be affected by your music”.
  • Do post cute animal pictures. Everybody loves a cute cat!

These tips will definitely keep your business on the right path on Social Media. If all else fails and you instantly regret posting a status or make an embarrassing spelling mistake, then there is always the delete button. We’ve all been there!

Now moving on to Bloggers.

1 – Bloggers should keep it personal with a hint of business.IMG_2132

I’m completely reversing the formula in comparison to how businesses should behave on Social Media.

I’m a Blogger, so writing about how to behave on social media as a Blogger is really easy for me. I have literally made every mistake in the book so I can 100% talk with experience.

People read blogs to feel connected with someone. I read blogs because I like to hear their opinions on products, fashion and even politics. So it’s important that your social media feeds aren’t just filled with “have you seen my blog post? Visit www.no-one-wants-to-see-this-sort-of-thing12345.com.” type posts.

When users follow you, or visit your social media, they’re looking for a real time version of your personality. They want to connect with you and are happy to read about your daily activities and hear all about the first date that went wrong. What users don’t want to see is controversy for the sole point of being controversial and trying to get followers. It’s difficult knowing boundaries as a Blogger on social media as users still expect a ‘degree’ of professionalism from Bloggers as people of online influence.

2 – What Not To Do On Social Media As A Blogger

Here is a list of a few things I recommend a Blogger does not do on social media:

  • Do not get involved in arguments or heated debates. It just portrays you as a ‘troll’.
  • Do not post ‘click bait’ titles to your blog – followers see straight through them and invariably dislike it. (Click Bait titles are catchy titles such as “I’m Marrying My Dog?” when actually you simply say “I love my dog so much I’d marry him if I could” within a blog post that is completely different to the status).
  • Do not post images that belong to other bloggers unless you have their permission.
  • Do not start a campaign unless it is something you truly are passionate about and there are no other likeminded campaigns to get involved with. Followers see it as attention seeking and invariably unfollow.
  • Do not post controversial statuses just to get followers.
  • Do not criticise other bloggers or celebrities. Followers just think of it as ‘sour grapes’.
  • Do not post anything sexually explicit, religiously controversial or politically damning. You could be sued. Yes, it has happened to other bloggers.

These are the holy grail of social media No’ No’s for Bloggers so be sure to stick to them.

3 – What should I be posting as a Blogger on Social Media?

Here’s a list of a few things I would recommend posting as a blogger on social media:

  • Do show a BTS (Behind The Scenes) image – people love to see how you work when you’re creating content.
  • Do reply to people who take the time to tweet or message you. It’s just good manners and makes you more human.
  • Do post positive quotes and memes – these are a ‘favourite’ and ‘liking’ goldmine.
  • Do let people see snippets of your life, such as your meals, workouts, outfits and so forth.
  • Do get involved in discussions – politely!
  • Do advertise your blog content (2-3 times per day is most effective)

These ‘do’s will be sure to keep your social feed interesting at the same time as serving it’s purpose which is ultimately to drive traffic to your blog.As you can see, being a business and being a blogger are two very different things and as such come with very different ‘guidelines’ for social media.

One thing that does apply to both bloggers and businesses is that if you are sent a ‘troll’ like message which contains profanities and is derogatory to you or your business, then simply do not draw attention to it and ignore it. Rising to it encourages more comments of the same nature and makes you or your business look bad at the same time.

I hope you’ve found this article helpful! If you have any questions or suggestions, then feel free to comment below or tweet us @purelysocialtip

Until next time!

Holly x

5 Tools Your Business NEEDS To Survive

IMG_1909

The title might be a tad dramatic, but in all seriousness, these tools are the base of everything I’ve been discussing with you over the past few months. One of the main things I’ve always said is that even if I was broke and only made $10 in a year on my business, I would still invest that $10 in PR. “PR” covers everything from advertising to marketing and quite frankly, not a single business in the world can survive without it.

As I’ve said many times in these articles (yes, I know it’s boring, but it’s really important and I’m going to keep repeating myself until I’m blue in the face or at least until my fingers are from all the typing and whatnot) that you needn’t spend a single dollar to promote your business. It’s about knowledge and knowing where to go. If you spend an hour or two every week researching new tools and features to help promote your business then you’d be surprised at the amount of ‘free’ coverage you can gain for your business.

Sometimes narrowing down the vital tools your business needs to survive can be hard considering there are literally thousands of tools available online at the touch of a button. Here, I’ve narrowed it down to five just for you the lovely readers of Purely Social Media! (You’re welcome). These are in no particular order as these are equally as important as each other.

1 – A Survey Tool

Here’s something I haven’t really gone into great depth about here on Purely Social Media. Surveys are annoying when they are a pop up or if you need to answer one to gain access to certain content. However, a strategically placed survey (right column of the homepage) actually encourages your visitors to interact by completing the survey which also gives you some insider knowledge about your visitor.

Here’s an example of three good survey questions:

1 – Which gender do you identify with?

2 – Which age group are you in? (select below)

3 – Do you have a (free) membership with us?

We all know how difficult it can be to get a good demographic about who is actually our audience. Asking your visitors their gender and age group will help you to narrow down who your visitors typically are and can help you to cater content to that demographic. For example, if your average visitor is a female aged between 35-41 years old then you could write more articles tailored towards parenting, buying a home or tips on de-stressing (we all know having children and moving home is enough to give even the calmest of people stress!).

The final question “Do you have a (free) membership with us?” was chosen because of two reasons – one reason is because you make it obvious that they are missing out on something if they are not yet a member. The “free” in the question encourages your visitors to register a membership with you because they have nothing to loose. The second reason the question is a good one to ask is because it also lets you see the ratio of how many visitors are returning visitors to your website in comparison to new visitors. Again this allows you to cater your content to the audience.

The survey tool I would recommend is definitely Google Forms. It’s free, it’s easy to use and gives you a tonne of customizable options. There are dozens of online tutorials on using it, however Google have made it pretty straightforward for any users. I would recommend letting a survey run for a week and then changing it up a little to let your visitors see you are adding new content regularly.

IMG_1910

2 – Email Marketing (Newsletters)

Again, this is another one we haven’t really discussed at great length before. Newsletters can often be annoying and can back up in our email inboxes without ever being read. However, sometimes, if we are interested in the sender or the subject line, we will take the time to browse through those newsletter and on occasion will even find ourselves placing an order with the company.

Email Marketing (AKA sending a newsletter) is an advertising dream come true. Whilst I wouldn’t recommend flooding the newsletter with flashing banners, I definitely would recommend sending a weekly newsletter to your subscribers to let them know about any new offers, products or information you may have.

I would recommend using Mail Chimp for sending out your newsletters. Mail Chimp allows you to send 12,000 free emails per month to up to 2,000 subscribers for FREE. Of course, there are paid options available if you wish to send more than the free monthly allowance. The software is easy to use and can integrate with your mail software to manage your contacts. Again, there are dozens of ‘how-to’ guides online if you need them.

If I had to choose one “DO” for email marketing, it would be to always have a hook subject line. The sender and the subject line are the first things you see in an email and having a ‘hook’ can make the difference between generating a sale of hitting the recycle bin. Here’s an example of a good subject line:

“Limited Time Subscriber Only Discount!”

By saying it is a ‘limited time’ discount, you give a sense of urgency which makes your reader more likely to click the email which will of course contain the discount, but will also contain a few advertisements too. By mentioning the deal is for subscribers only, you make them feel a bit special and as if they’re getting something that not everyone else will receive. This is a sales strategy that has been used for a long time but it’s one that continues to work!

If I had to choose one “Don’t” it would be: do not send anymore than one email per week. If you bombard your readers, you’re more likely to find your newsletter in the trash can before it’s even been read. You’re also more likely to lose subscribers if you send too many newsletters out as they see it as a nuisance. I would recommend sending a newsletter out once per week at the same time each week. This will let the subscriber know when they can expect to hear from you and might even look forward to receiving it.


3 – Social Media Management

Twitter, Facebook, Pinterest and the dozens of other social media platforms are sometimes never ending. As I’ve said before on Purely Social Media, it’s important that you have a social media Management platform to help you with your social media accounts.

Buffer is a great app for social media management. Using the app is simple and straightforward. You simply type a status and an image (if you wish to choose one) and share it across whichever platforms you like at whichever time of the day you prefer. Scheduling is definitely a blogger’s best friend and will save your business a lot of time at the same time as promoting your content regularly. Buffer is free to use and can be downloaded on any smart device.

IMG_1911

4 – Affiliate Marketing

The blogging industry is huge and speaks for itself. Thousands of brands send products and information to bloggers in the hope that they will feature those products or information on their blog which could potentially drive thousands of new visitors and customers to your business.

It’s tricky knowing where to send your products. However what I would recommend is searching for bloggers either for free on Google search (by narrowing down results based on location and demographic) or by using paid for tools such as Buzzsumo is recommended.

As I’ve said before, you can do this for free – I would recommend going onto Twitter and writing a status about your request for bloggers and use some clever hashtags to find them. Here’s an example of what I mean:

“#Bloggerswanted to try out & feature a new skincare product. DM us for details! #journorequest”

That way you know that you’re only going to hear from people who are genuinely interested and are likely to feature you. It also means you can have a look at their Twitter profile and blog prior to sending a product to them.

5 – Contributors

Last, but by no means least, for today is Contributors. As you know, I am a contributor here at Purely Social Media and am compensated for my time and information. However, with that being said, I am only one blogger of millions. A lot of Bloggers will contribute to your site if you offer them something in return (not always money!). If you offer them “A front page advertisement of your blog for one month” in exchange for a 500 word article which they then will promote on their social media, you might be surprised at how many bloggers would be open to this.

Aged bloggers are less likely to take you up on this offer as we often don’t require an advertisement at that moment in time. However smaller, new bloggers might be open to it.

I would recommend contacting some bloggers and asking politely, if they would be interested in this. Some might not even respond to you, however some might be happy to contribute which again gives you fresh content for your site and if they are happy to share it on their social media then you might attract a whole bunch of new visitors or customers.

To top it all off, the blogger community is a popular one. Your name might end up being mentioned in the industry which can help to open up new doors for your business.

You’re definitely not the only ones looking for free exposure – it can be mutually beneficial.

Well there you have it, my top five tools your business needs to survive. I know it’s been a long one today but I’m certain your business will benefit from implementing even just one of these steps.

Let us know your thoughts and any other suggestions in the comments below or feel free to tweet us @purelysocialtip

Online Marketing 101: Identity Economics

ONLINE MARKETING 101-

The marketing industry comes with a myth attached to it. You’re told to focus on your customer as an individual. You are told to know the individual as well as your favorite shoes, profile them, study their thoughts, find out their wants, and match your advertising accordingly. Except – as the latest idea in economics goes – there may be no individual. There is only group. Or to put it in another way: The individual buys according to what the group says. Knowing more about this idea can give you another handle on how to market your wares. And maybe sell them more effectively.

Identity Economics: It’s The Group That Buys Your Products

Our marketing principles come from traditional economics. Reasoning goes that people have their wants and needs. You’ll sell your product if you find out what those wants and needs are and show your targeted client how you can help him better than anyone else.  This way of thinking assumes that the targeted client knows his needs and chooses independently.

Marketing is based on this traditional economic view. Almost every single marketing modality from customer-centric to relationship marketing pivots the customer as an individual.  Personalized marketing says draw up a thorough profile of your desired customer – clothes, breakfast, schools, and so forth – so you know exactly whom you’re reaching.  Social media marketing tries to forge cozy interactions with the client. That’s what surveys are for! They ask the desired client, “Pray pretty please. What do you want and how can I help you achieve it?” Metrics measure whether or not your customer has bought. If so, supply more. If not, repeat the process.

Only the decision-maker may not be the individual. It may be the group. In which case, your marketing may flounder unless you consider that angle.

Identity Affects Your Health, Wealth, And Success

Sixteen years ago, economist and Nobel Prize winner George Akerlof and professor of economics in Duke University Rachel Kranton, launched their theory of identity economics. The model says that our identity affects our health, wealth, and success – and everything in between.

Identity refers to the different groups that we belong to, such as religious, gender, national, class and so on. People identify with different groups at different times.

How can we relate identity economics to marketing?

People buy according to their group because they want to conform. This makes them feel good and gives them some sort of social status. So they eat what their group does, dress as their group does, send their children to the same schools as the group does, ad infinitum. Kranton and Akerlof concluded: If you want to motivate someone don’t look into every nitty-gritty about the person. Scrutinize the norms of the group.

For instance, I run a site that offers hidden jobs to freelancers. Recently, a person tweeted: “Thanks but doesn’t look secure … this site is flooded w/shady gigs…The site isn’t safe for any legit freelancer.” The visitor explained: “Indians don’t pay well/on time.” (Note: 5% of the ads are from companies that carry Indian names).

Ordinarily, I would have have rejected this visitor’s feedback as prejudiced. The theory of Identity Economics made me look beyond her as being an individual and made me consider her opinion as Group. I looked into whether or not she was my typical client. If so, I would have to reluctantly use her feedback as cue to restructure my marketing because I wanted to sell.

This case also made me wary of using my bounce rate as a metric of site success. Marketing analytics urge you to monitor your site’s statistics. But maybe visitors leave because aspects of your site conflict with their social beliefs. Maybe you retain only two or three people but these are the people you want.

Looking at the prospective client as reflecting the opinions of a group rather than the opinions of him or herself give you a different handle on your marketing.

On The Other Hand…

Identity economics has its limitations. Marketing research recently found that advertising backfires when it scrunches the person into a group. Cases include Jif peanut butter that targets mothers by noting that “Choosy moms choose Jif.” or DirecTV that advertises, “If you call yourself a sports fan, you gotta have DirecTV!” or Gamefly.com that urges video gamers, “You call yourself a gamer? You have to have it!” or when Chevrolet asserts that real Americans drive Chevys.

In each of these cases, those who were surveyed protested that they have a mind of their own. They disliked being lumped into a group!

So, social context is an answer, but not the whole. Our self-concept is made up of both a personal identity and a social one and, when marketing, we can profit by considering both.

How Can You Use Identity Economics To Improve Your Marketing?

  1. Target marketing to the group – I work for a solar company that markets itself on price and environmental concerns. Research, however, shows that people put solar panels on their homes when other solar-powered homes are nearby. I adjust my marketing accordingly.
  2. Boost the signal strengthCustomers tend to tend to select products that most clearly broadcast membership in their specific group. Subtly highlight those signals or omit them. For instance, blood donation levels go down when blood donors are paid to give blood. The social identity of giving is core to the motivation and this is the aspect that needs to be highlighted.
  3. Ignore bounce rates – Rather focus on how you can improve your product so that it helps your customers. People are always going to be influenced by their cultures and there’s nothing you can do about that. Focus on the product and keep on marketing. Your clientele will grow.

In short, people buy according to a variety of reasons. Social context is one of them. Knowing how group comes into the buying can open up cost-effective ways of improving your marketing. It is individual as well as group that decides.

Look into both to sell.


Using Hashtags Effectively On Social Media

IMG_1389Everyone from Kimye to Politicians use hashtags on Twitter, Instagram and Facebook. Some people even use it in day to day conversations nowadays. #Guilty.

I have a love hate relationship with hashtags. When they are used correctly, they add to your content and attract new followers/customers/UFO’s. Used wrongly, and they can be pretty annoying to see. Sometimes you see people typing a 20 character status on Twitter and use the extra 120 characters on hashtags – #wrongwaytousethem! There’s a thin line between tolerated and completely intolerable. So, lucky for all of you, I am here to tell you how to use them effectively to benefit your business or blog.

Being a Blogger of almost five years means you get to hear about all of the funny mistakes I’ve made over the years, knowing you will never face the embarrassment of making the mistakes I have. I once posted a picture on Instagram of my cat and used the hashtags “#cutecat” “#CatsofInstagram” and uhm… “#Faceoftheday”. For starters, I had clicked the option to automatically share my Instagram posts to twitter and Facebook and because of this “catsofinstagram” was completely irrelevant on the other platforms. Aside from that, let’s move onto the elephant in the status “Face Of The Day” obviously does not relate whatsoever to my cat picture. I only used it because it was a popular hashtag. I ended up receiving about 5/6 notifications telling me I was using “Click Bait” (where people use catchy titles or hashtags to encourage people to click on the item despite it being irrelevant) and those people unfollowed me. I didn’t even have an excuse for it, I genuinely just wanted more people to see my status. #Fail.

So, moving on to using them the right way…

Frequency Of Hashtags

Twitter was the originator of the hashtag. Originally, people thought the idea would never catch on but Twitter blatantly have had the last laugh with hashtags being used across all social platforms from Instagram to Facebook and even Pinterest.

According to Twitter, using two hasthtags in your status doubles the chances of engagement, meaning you’re more likely to receive a comment, a ‘like’ or even a follow. If you’re really lucky, you might even be retweeted which opens the door to many more people. With that said, using three hashtags actually drops this chance by 17%. Facebook is a hub of hashtags, but personally, I use only one hashtag at the most.

For Instagram, people don’t really seem to be too put off by hashtags and I think that’s partly because they don’t look so dominant in statuses – for example, the image is the dominant feature of the post and the hashtags are written in blue making them less prominent than the black you see on Twitter or Facebook. Feel free to go wild with hashtags on Instagram but always keep them relevant. We all know that #fitspiration or #f4f are popular hashtags but they’re no good to you or your visitors unless your image relates to them. If, for example, you are in the beauty industry and are posting an image of lipsticks, then you might opt to use “#beauty #makeup #lipstagram #lipsticks #faceoftheday #pretty #bbloggers” – all of these are relative to the content meaning you’re more likely to get interaction from the people who see your post, such as a ‘like’, ‘comment’ or ‘follow’ (if you’re really lucky, you might even get a regram which is basically Instagram’s version of Retweeting).

It’s also a good idea to use your business name as a hashtag to help spread the word about your brand. It’s also a good way to keep track of others talking about your business as it’s likely they will use the hashtag.

IMG_1392Research Your Hashtags

You needn’t pluck hashtags from thin air or be in the know about which ones work best, you can use online tools which will help you decide which hashtags will work best for you. I use Hashtagify.me for research, and if your business has a local presence, you might want to consider using Trendsmap which is tailored to your preferred location.

Aside from that, you may want to try doing your own research. You could try using one hashtag across your social media platforms for one week and see how they perform before trying a different hashtag the following week and so on. This will help tailor your results to your very own business and will make it much more personalised rather than from a wide demographic.

Communities

Mainly on Twitter, but also on Instagram, are communities who have similar interests and they all use a specific hashtag where those people will ‘like’ or interact in some way. These communities also host ‘tweetchats’ on Twitter where once or twice a week users gather and use the hashtag to participate in a discussion which has a different theme each time. This sounds a little bit complicated so I’ll give an example. As a beauty and fashion blogger, I obviously participate in related chats. Hashtags used for these are #bbloggers or #fbloggers and each week, a new host will tweet a question using the hashtag. For example:

“Welcome to #fbloggers – Q1 – What are your thoughts on runway to high street fashion?”

Anyone searching for the hashtag on Twitter (using the search feature) will be shown this tweet and any other tweets using the same hashtag. By responding or contributing to the chat, you will definitely see some interaction. I regularly receive around 10 new followers in each hour long chat (and I’m not even the host!). Just be sure to interact with other people by replying to them with a comment, or retweeting people. Be sure to always use the hashtag in your responses so other people can see them too. Just be smart with it – if you have success using a hashtag, be sure to use it as often as you can (just not more than once in one status as we have already discussed).

If you’re lucky enough to be the host for the chat (you can either start your own chat or request to be the host for another one by contacting the appropriate hashtag profile) then you can get literally hundreds of new followers – I hosted a chat once and it was trending for an hour because of the amount of interactions there were. It really is a follower goldmine.So, now that you know all about how to use hashtags, it’s time to get to work! We here at Purely Social would love to hear all about your success with hashtags and if you have any questions, please feel free to comment below or drop us a tweet @purelysocialtip

Thanks so much for reading this article! I look forward to returning with more useful information to help your business or brand.

Holly

How To Use Instagram In The Beauty & Fashion Industry

IMG_1294

Often I’m asked how I keep up with so many different social media platforms for my beauty blog. The answer is simple: research! Before deciding on four of the platforms that I thought are most beneficial to my business, I took some time to do research and really see what platform was best for me. See more about that process here. Of all the social platforms I’ve used, Instagram is easily one of my favourites as it is effective for promoting my blog content and interacting with my followers. Not forgetting to mention that I’ve found gaining new followers to be relatively easy on Instagram (Bonus!).

So how can you use Instagram to promote your business?

Well, there are a few elements of Instagram to explore including using hashtags effectively, promoting your brand and how to gain new followers (we’re even discussing the pro’s and con’s of ‘buying’ followers #controversial). First, let’s talk about Instagram in general.

Firstly, Instagram is a photo sharing app. You can only access your Instagram via a cell phone or smart device. Initially, when I started using it, I found this frustrating because I wanted to access Instagram on my laptop or desktop PC when I was working rather than going on my phone and accessing it. Now, however, I actually prefer Instagram being an app rather than a website because it makes it more personal. As you will know if you read these articles regularly, I’ve mentioned that being personal is a followers goldmine. If you offer a personal touch to your online presence, people are going to interact with you as they do with their friends or family on social media. Not only that, but you can post to Instagram during your social hours without having to load a computer. #LazyBlogger…

In terms of content, keeping the pictures close to your business theme is recommended to ensure your potential followers know what they are to expect should they choose to follow you. Don’t be afraid to post up a cute cat picture now and again though, it shows you’re human and who doesn’t love a cute cat? (I’m Holly and I am a cute cat addict). Try to keep your content unique – no-one is interested in seeing the same thing on several accounts. New content is what engages your visitors.

Oh and for those of you who are like me and prefer to pre-schedule, you can also use Buffer or other social media management apps to time your instagram posts. You can thank us later.


Using Hashtags Effectively

The social media world is centered round hashtags right now. People are using guaranteed big search items like the Kardashians dropped into everyday statuses and conversations to attract a larger audience. Some hashtags attract a bigger audience than others, but just because a lot of people may see your post, doesn’t mean those people will click on it or interact with you. To effectively promote your blog, brand or business, you will be looking to encourage interaction on your social media pages. Very seldom will anyone visit your website or business based on a sweeping glance. More likely, is that they will visit if they see something relevant to what they’re searching for.

If you load a search engine and search for ‘popular Instagram hashtags’ you will see everything from #instadaily to #happy and #winitwednesday amongst dozens of others. While those hashtags are fantastic for posters who have daily content, who have a happy picture to share, or are hosting a competition. In the beauty and fashion industry other hashtags are proven to be most effective. Top beauty and fashion hashtags include:

  • #bbloggers (beauty bloggers official hashtags where other bloggers see the content – many of my followers are actually fellow bloggers so don’t forget to reach out to others in the same industry as you!)
  • #OOTD (Outfit of the day where people searching for this are looking for fellow fashionistas and fashion inspiration)
  • #hairspiration (gorgeous hairstyles from colour to styles can be found under this hashtag)
  • #fashion or #psfashion (pretty explanatory and #psfashion is for plus size fashion)
  • #makeuptutorial (short video clips showing mini makeup tutorials)

IMG_1295

Of course, there are dozens of other hashtags that can be used, so take a look at Top-Hashtags to take a look at more.

Using the hashtags in your post is simple. Steer clear of adding them throughout the status and always use less than seven in each post. A lot of people recommend using three or less, however as a personal opinion, I don’t mind seeing five or less and a lot of other instagram users have similar thoughts.

Here’s an example of an Instagram post using hashtags:

*insert image* – Loving this gorgeous eyeshadow. Who else thinks copper eyeshadows are beautiful? #bbloggers #makeup #copper #beauty

How To Gain Followers

Normally on social media, you can spend hours on end commenting on statuses and will get little to no followers. However Instagram is a whole new ball game. By searching for hashtags in the search feature, you will find thousands of users with similar interests to yours. Simply ‘liking’ their photo and commenting can encourage that user to not only follow you, but to also interact with you.

People like to be part of something popular, so once you get above 200 followers you are more likely to see an increase in followers simply by posting regularly. Which brings me to my next point, buying followers.

This is a controversial one because a lot of people dislike the thought of ‘buying’ followers. A lot of people might think there is no point in buying followers (I, myself, choose not to but it doesn’t mean I never will). Because people like to be part of something popular, you’re more likely to gain followers when you already have a lot of followers which is why some bloggers use sites such as fiverr.com to buy followers. It’s not against any rules as long as the accounts are active and comply with the standard user rules of Instagram so this is really a personal choice.

You can also promote your Instagram posts if you have a decent budget. For more information on this head on over to the Instagram help pages.

One thing is certain, Instagram is a social media platform that will always be around. With literally millions of users posting daily, the advertising and promoting potential for your business is endless.

We would love to hear your thoughts on Instagram (and what your thoughts are on buying followers!) so please do feel free to leave your comments below or tweet us @purelysocialtip

Cracking the Deep Web: How to Get Steady Customers Fast and Free

Hi Guys, Mika here!

As you know, we’ve been increasing our team to include a few new bloggers varying in expertise. The newest member of our team, Leah Zitter, has a wealth of experience in SEO and the deep web. This week’s article is an introduction to just that. Enjoy! 

visible web

Three years ago, I used the Deep Web to promote my website that offers hidden jobs for freelancers. As far as I know, I was and remain the first person to do so.

I invested three hours a week using Deep Web engines.

Within that first month, I gathered 375 visitors.

What is the Deep Web?

The Deep Web consists of all sites that are hidden from search engines such as Google, Yahoo, Bing, or DogPile. Regular search engines can only retrieve information from pages that are accessible to it or that are large enough to be discovered. But there are many other groups on sites such as Twitter, Behance, Ryze, forums, password-protected business sites, Tumblr, Reddit, or up-and-coming blogs that are inaccessible because they are too small, password-secured, or not registered with search engines.

The science journal Nature notes that Google only indexes 16 percent of the surface Web and misses all of the Deep Web. This means that about 3000 out of 1 web pages are hidden from engines. Think of the ocean and the hiddenness below. The ocean is your worldwide web. Underneath is your deep or invisible web. This is where your clients chat.

I sought tools that could probe this hiddenness so that I could connect with them.

Why I used the Deep Web

Part of the reason I turned to the Deep Web was because I was looking for other ways to conduct free surveys. I also wanted to probe my targeted person’s subconscious needs. I wanted to connect with them in as real a way as I could and show them I could help them. For that to occur, writing articles was not enough. I wanted to talk with them; to capture their words for help so that I could refer them to my service. Along the way I sought their opinion. The engines that probe the deep web helped me do this. They helped me make some of my posts viral.

I collected 78 FB followers from zero in 2 months and gathered references from those who tweeted their thanks.

Method

I spent 8 months tracking down uncommon engines that dated since 2000. I investigated those that survived. Engines dip in and out of existence regularly, so, for instance, I wrote a few articles on MetaSearch.org only to have that amazing search engine die within months of those articles  being published.

I also read books on the deep web such as The invisible Web: uncovering information sources search engines can’t see by Chris Sherman and kept up-to-date with events on the Deep Web via researchbuzz.me.

Thirdly, I probed and used some of the methods of certain HR recruiters who had devised their own systems for spooning out hidden names.

Most important, I am a research scientist with an advanced degree in logic and formal training in Search Engine Marking. I used that training to fiddle with different keywords and algorithms running some for a few months before adding or replacing with others to see which terms, posts and sites were most popular and effective.

Here are the results.

Deep Web Engines: Top 3 for advertising and marketing on forums and groups

Boardreader – You’ll want to use the ‘Advanced Search’ to help you make the most of this site. Few engines need as exact keywords as this does. Surprisingly, I found the Imbd option helpful.

Omgili –‘Oh My Gosh I Like It’ really does help you find communities, message boards, and discussion threads on any topic. Type in your key words (I used ‘looking for freelance _’) and access Discussion Posts or Blog Posts. You may find News Articles helpful.

Webring – Find people and groups who share your interest. It is small (because its relatively new) but its members are more earnest than on FaceBook and you can engage with them at greater length than you can on Twitter.

Deep Web Engines: Top 3 for advertising and marketing on social media

Socialbearing.com – This engine helps you drill Twitter. It is excellent for tracking real-time conversations.

Twazzup.com – This is a new all-in-one Twitter search engine. Twitter has other search engines that you can use such as OneRiot and Louis Gray, but the helpful thing about Twazzup is that you can type in whatever interests you and Twitter returns all – noise and all.

Smashfuse.com – Terrific. Smashfuse travels FaceBook, Twitter, YouTube, Google+, Pinterest, Vimeo, Tumblr, and Flickr among others. It is also fast. Minuses: It lacks advanced options. (I add date or country to the keyword or I simply use general keywords. The latter option is probably best).

Deep Web Engines: Top 2 for advertising and marketing on blogs

Blogsearchengine.org – This engine swims through stumbleupon and delicious. Minus: It lacks advanced options.

MeltwaterIceRocket.com – This is one of the most powerful blog search engines. It searches blogs, Twitter, Facebook, and sites on the worldwide web. I  use the advanced search options to type in certain words such as ‘ paying submissions’, the date (‘today only’) and tag – which searches for words in the post. Example [tag: writer telecommutes].

Deep Web Engines: Top 3 for getting eyeball-boggling content

Dotmos.com – It helps you dig news in your field that you may less likely see on the common search engines. I use it for real-time conversation and for creating content.

GigablastGigablast is an open source engine. You’ll find its advanced search options below the blue border of its title. I sometimes also use ‘Ixquick’.

Tiptop insight engine – This engine captures news. If you’re savvy with your keywords, it can help you capture real-time conversations. The engine needs permission from Twitter to grant you access but it digs up from pages that are well beyond Twitter.

Interesting, right? Feel free to reach out in the on twitter, via email, or in the comments below with any questions, comments, or if you need help implementing. We look forward to hearing from you!